
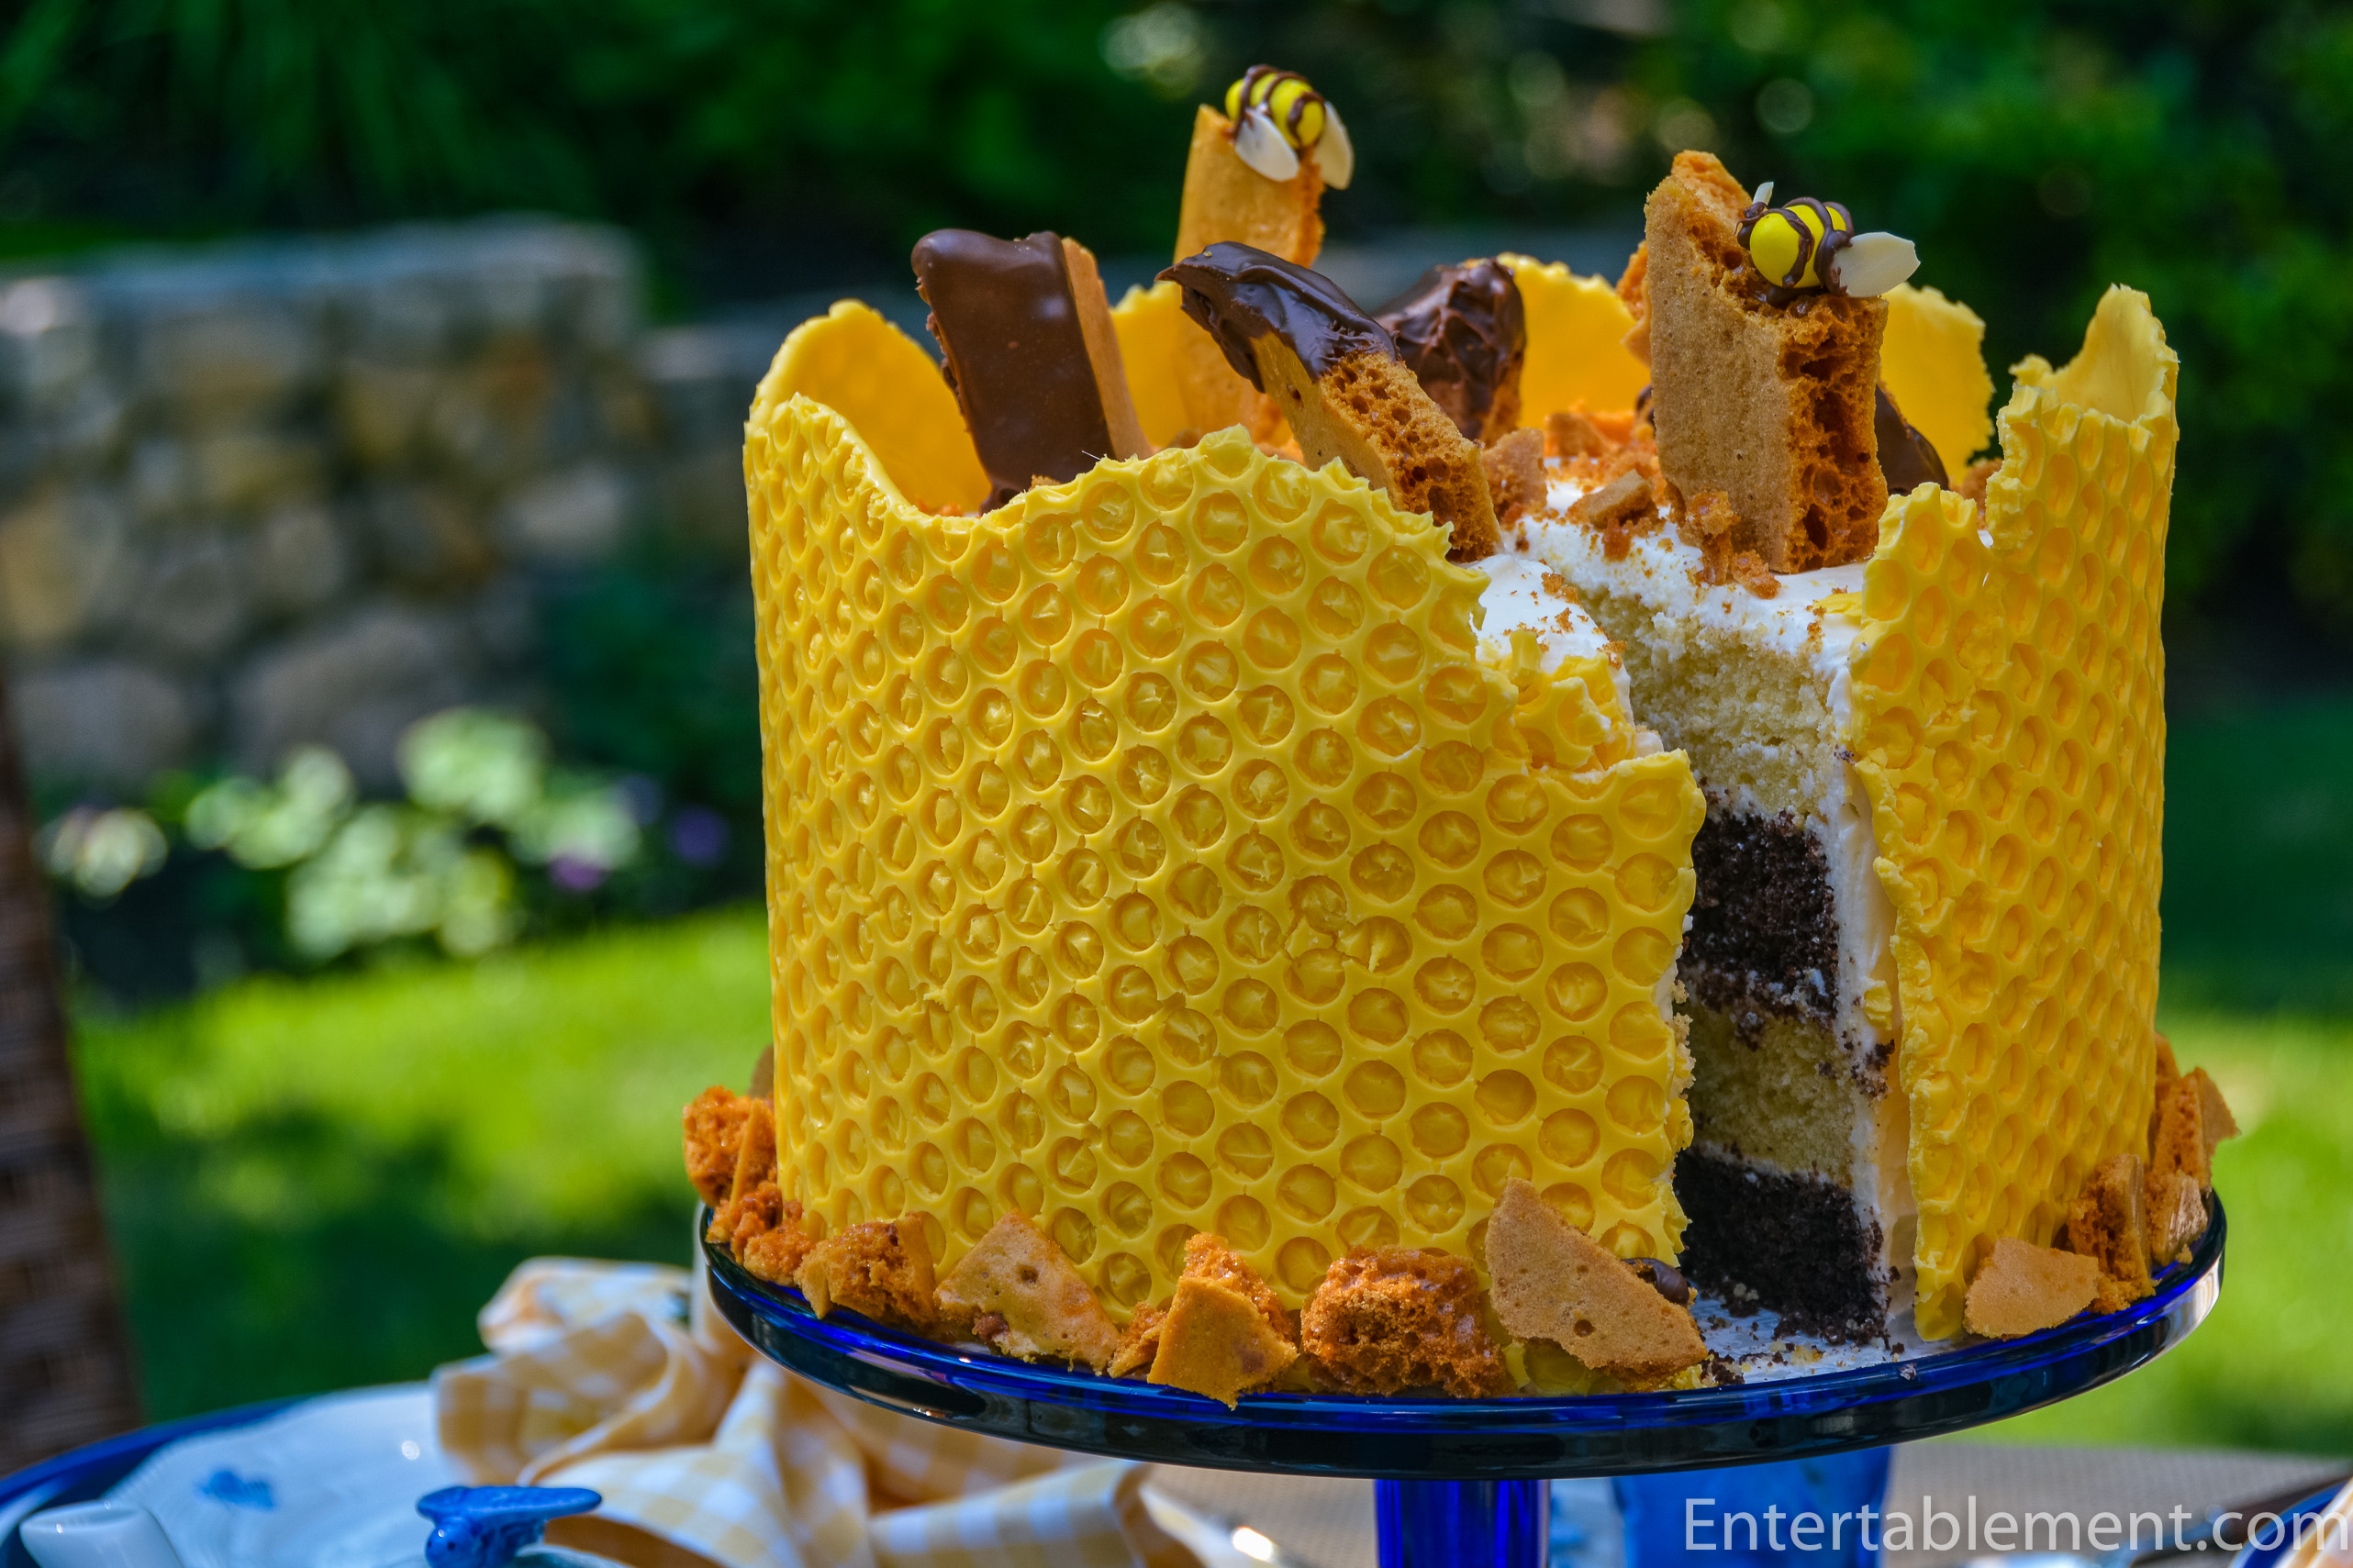
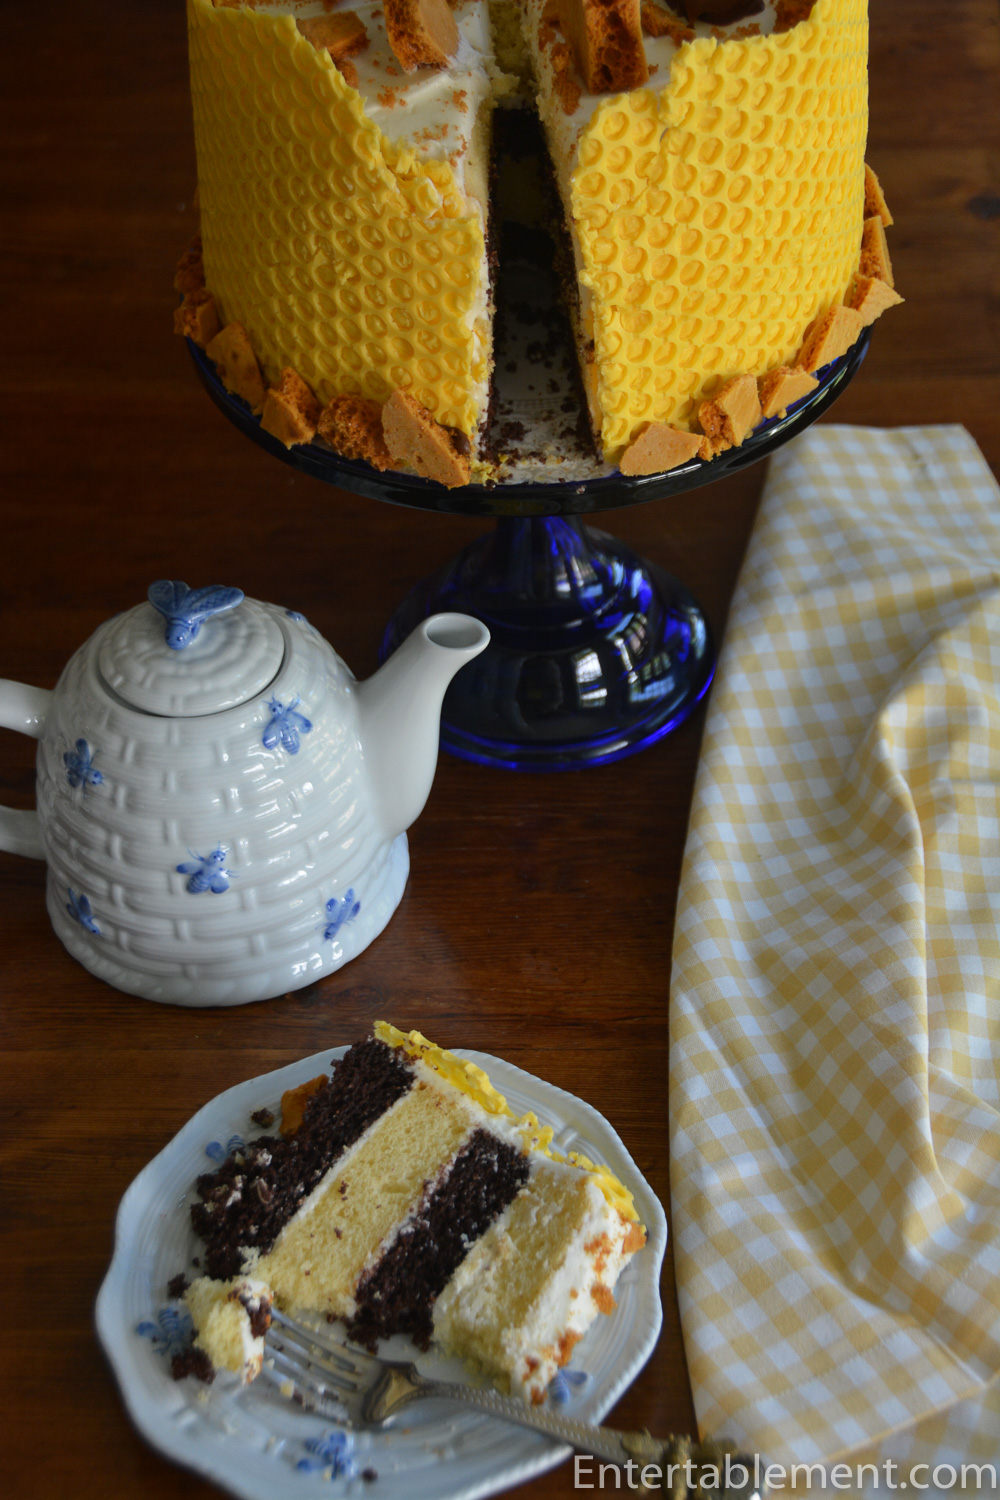
When searching for a suitable dessert to pair with my Sadek Blue Bees, I came across this gorgeous, but somewhat ambitious cake. I’d never worked with candy melts before, but who could resist that honeycomb exterior? Made with bubble wrap, no less!
I read the instructions and watched the video a couple of times and figured it didn’t look too intimidating.

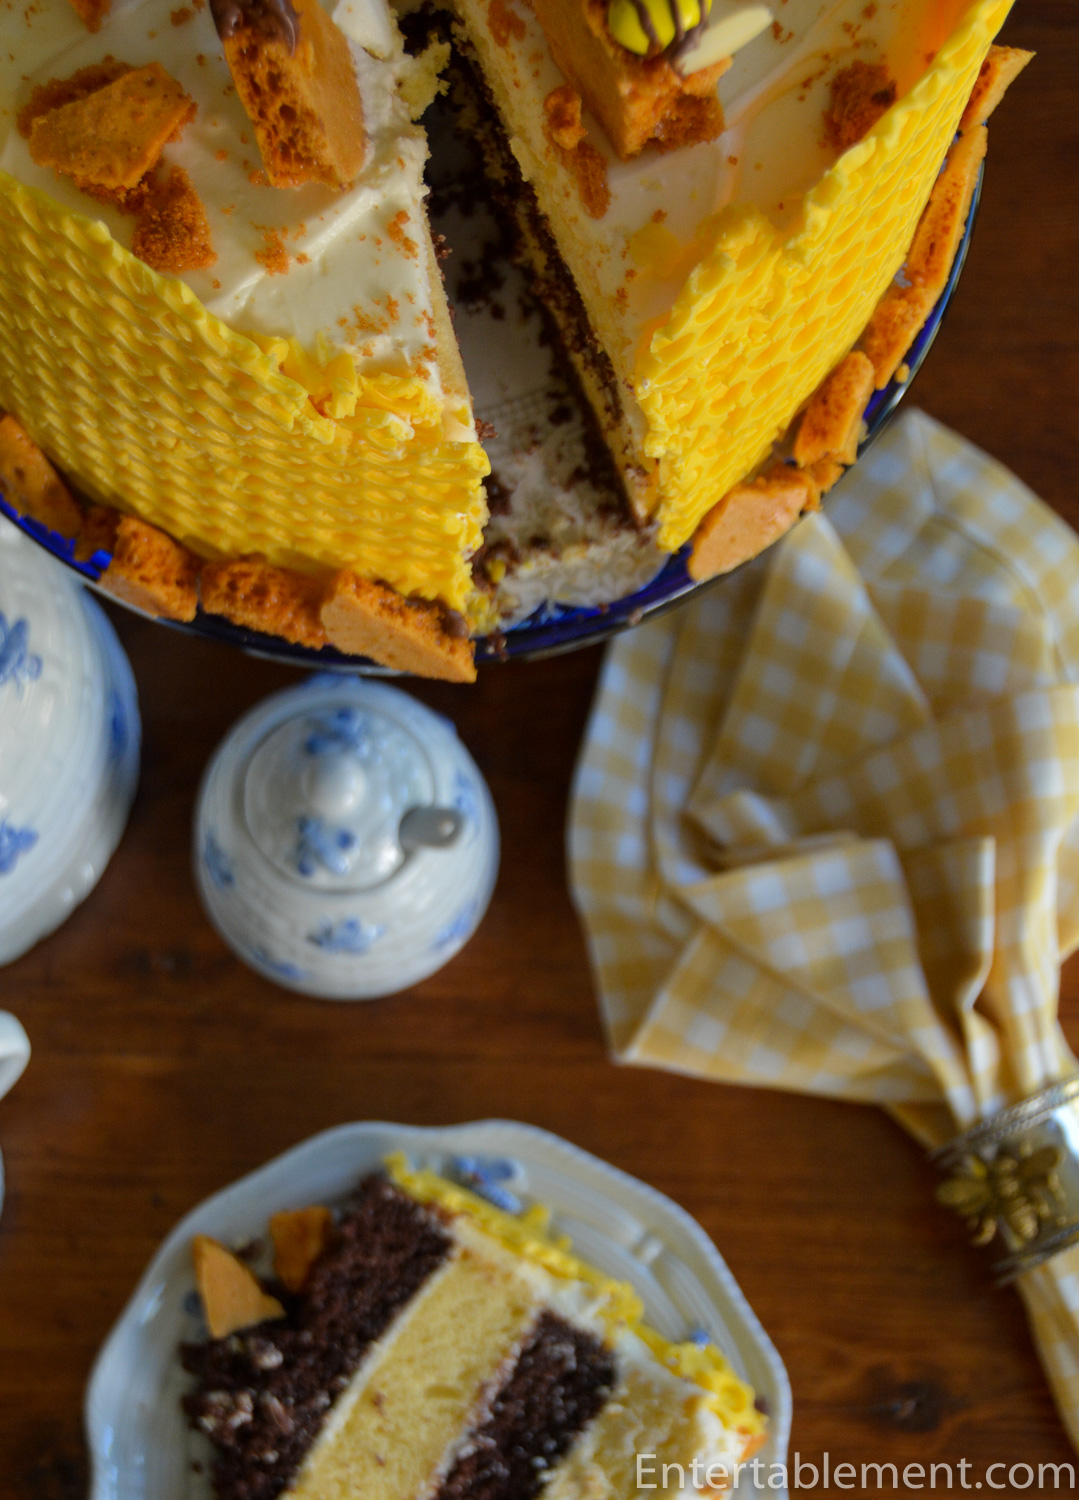
After reading the reviews, I modified the cake in a couple of ways: First, I substituted buttermilk for the water in the cake mixes and used 4 eggs rather than 3. I picked up this tip from the folks at “Hello Cupcake“, who know their onions where it comes to baking cakes suitable for elaborate decor. The buttermilk and extra egg substitution make for an incredibly moist, slightly denser cake that rises evenly and has enough heft to take on the decor.

Second, I made a traditional cream cheese icing, rather than the honey version which was deemed too sweet and bland by the reviewers.
Making the sponge toffee was a hoot. I grew up on Crunchie Bars as a kid (a Cadbury product available in the UK and Canada) and was eager to try a homemade version. Plus, the inner kid/mad scientist in me couldn’t wait for the moment when I got to add the baking soda and watch the toffee fizz up

It worked like magic. Again, reading the reviews, I used a more traditional recipe with less baking soda and plain sugar, rather than caster sugar. The video from Tasty Co is here.
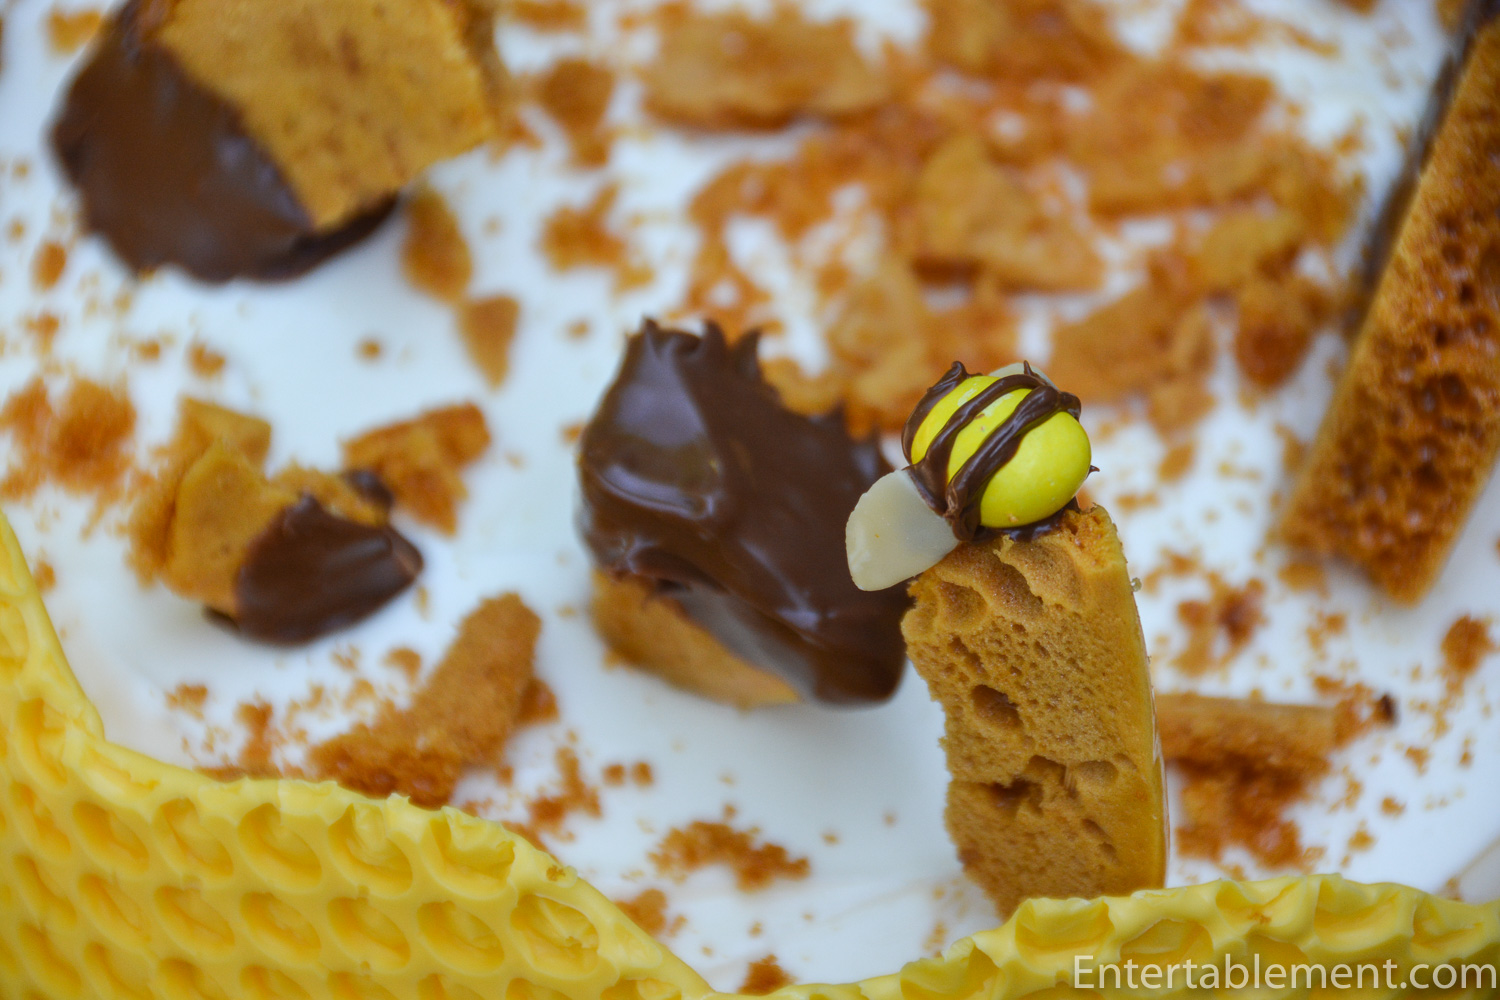
I made a couple of bees using yellow M&Ms and some drizzles of chocolate for the stripes and sliced almonds for wings. They’re not quite as nicely rendered as I would have liked – I need more work on my piping. My intention had been to make them with brown M&M’s, and a few drizzles of the yellow candy melts. I forgot that step until after I’d plunged the bowl with the scrapings of melted yellow candy into a sink of soapy water. Darn…

They look better from a distance. 😀


Honeycomb Cake
A beautiful layered chocolate and yellow cake with delectable cream cheese frosting and sponge toffee garnish. The candy honeycomb exterior is the pièce de résistance!
- Total Time: 2 hours 25 minutes
Ingredients
Ingredients for the cakes
- 1 yellow cake mix (15.25 oz)
- 1 chocolate cake mix (15.25 oz)
- 2 c buttermilk
- 8 eggs
Ingredients for the cream cheese frosting
- 8 oz unsalted butter, softened
- 1 lb cream cheese, softened
- 4 c powdered sugar, sifted
- 1 tsp vanilla
Ingredients for the honeycomb wrap and sponge toffee garnish
- 24 oz yellow candy melts
- 2 c sugar
- 1/2 c honey or corn syrup
- 1/3 c water
- 8 oz milk or dark chocolate
Instructions
Bake the cakes
- Prepare the two cakes according to the package instructions, substituting 1 c buttermilk for the water, adding 4 eggs instead of 3, and using whatever amount of oil or butter is called for. Trust me, these substitutions are worth it; the cakes are very moist and rise evenly. I used 9″ cake pans.
- Cool the cakes completely, and then trim them to remove the domed tops. You can use the scraps for cake pops, parfaits, or just munch on them with some leftover icing. They never go to waste in our house!
Prepare the sponge toffee garnisb
- Cover a baking tray with greaseproof or parchment paper. Set aside.
- Put the baking soda into a small bowl and set it to one side with the whisk at the ready.
- Mix the sugar, honey and water together in a large saucepan. The mixture at least triples in size, so you’ll need lots of room.
- Turn up the heat and slide a thermometer into the mixture. Heat till the sugar mixture reaches 275°F (140°C) and is brown and bubbling. Remove the pan from the heat, and place on a cutting board.
- Take the thermometer out and quickly whisk in the bicarbonate of soda. It will fizz up a lot.
- Pour the honeycomb into the prepared tray and leave to set for a couple of hours. Do not touch the honeycomb at all throughout.
- Once set, smash up the honeycomb into bite-size pieces.
- Dip into the melted chocolate and chill.
- You’ll have lots leftover for munching!
Prepare the frosting
- In the prep bowl of a stand mixer, cream the butter and cream cheese on medium speed until well combined, scraping down the sides of the bowl as needed. Add the powdered sugar and and beat on low until mostly combined. Increase the mixer speed to high and beat for 3-5 minutes more, until the buttercream is light and fluffy. If the frosting is too soft, you can refrigerate it for 10-15 minutes so it stiffens slightly.
Assemble and frost the cake
- Place a cardboard cake round on a cake turntable and dab a small amount of frosting in the center of the cardboard round. Centre one yellow cake layer over the dab of frosting. Using an offset spatula, evenly spread about ½ cup of buttercream on top. Top with a layer of chocolate cake, then another ½ cup of frosting. Repeat with the remaining cake layers and frosting. After adding the final layer, lightly frost the entire cake to create a thin crumb coat.
- Refrigerate the cake for 15 minutes.
- Cover the chilled cake with the remaining frosting in an even layer. Return the cake to the refrigerator for 15 minutes more, to allow the frosting to stiffen.
- Take the cake out of the refrigerator. With the bubbles facing outward so they don’t get frosting on them, wrap the sheet of bubble wrap around the perimeter of the cake. Trim the wrap to form a collar that fits loosely around the cake and comes about 2 inches over the top edge. Remove the bubble wrap. Keep the cake in the refrigerator until you’re ready to finish the assembly.
Make the yellow candy honeycomb
- Place the candy melts in a medium microwave-safe bowl. Microwave on medium power (not on high, which will cause the candy to seize) in 30-second intervals, stirring in between, until the candy is fully melted and smooth.
- Place the bubble wrap bubble-side up on a flat surface. Pour most of the melted candy along the bottom two-thirds of the bubble wrap. Working quickly, use an offset spatula to spread the candy over the bubble wrap, leaving the top third empty. Once the bottom two-thirds are evenly covered, use a spatula to spread the candy in a wave pattern along the top edge. Let sit for 5 minutes.
Adding the honeycomb exterior
- Remove the cake from the refrigerator and position it near the bubble wrap.
- After 5 minutes, test the bubble wrap by lifting up a corner. If it looks like it is beginning to harden and has a sheen to it but is still pliable, it is ready to be used. If the candy is still very loose and dripping, let sit for another 1-3 minutes, checking every minute.
- Once the candy has set, pick it up by the top corners and quickly wrap the side with the candy around the cake. Press it onto the cake so it sticks to the icing. Once attached, try to slowly peel one corner of bubble wrap off the candy. It it sticks to the bubble wrap, let sit for 1-3 minutes, checking every minute, until ready to peel. If it begins to peel, continue slowly peeling off the bubble wrap until entirely removed. If the candy cracks while you are peeling off the bubble wrap, either remelt and repeat the process, or break it into large shards to decorate the outside of the cake. Refrigerate until serving time.
- Immediately before serving, top the cake with homemade honeycomb pieces and crushed honeycomb.
- Voilà!
Notes
You’ll need the following equipment
- cake turntable
- cardboard cake round
- large offset spatula
- candy thermometer
- Clean bubble wrap, at least 27×7 inches (70×18 cm) piece. 5/16 inch (1 cm) thick
- Prep Time: 90
- Cook Time: 55
Nutrition
- Serving Size: 10

I’m sharing this post with Between Naps on the Porch.

This is really a spectacular cake. Just the thing I love to try! Well done. 🙂 What a show stopper! WOW.
Thanks, Gary. It was time-consuming, but not difficult. If you like this sort of thing, check out the videos on Bon Appetit. Claire does a five-part series of baking and decorating layer cakes. Here’s video #5 https://video.bonappetit.com/watch/episode-5-decoration
So cool to watch a professional with a sense of humour. Enjoy your weekend.
Thank you Helen, I just watched the episode on cake decorating and it was great. She is delightful!
Isn’t she fun? I learned a ton! I watched the whole series.