When I was little, a crisp, spicy gingerbread cookie adorned with crunchy icing was the tantalizing reward to encourage exemplary behaviour while Christmas shopping with my Mum. Trailing around after her, scarf dragging and winter boots clumping, my thoughts would run ahead to the treat in store.

The last stop of the day was a small German delicatessen where Mum would purchase marzipan fruits to decorate the Christmas cakes, whose bottoms had been receiving weekly applications of brandy since they had emerged from the oven in October. A luscious assortment of pastries, including the coveted gingerbread cookies, greeted us upon entering the store. Which one to choose? A Santa, a reindeer or a Christmas tree? Greedy child that I was, it all hinged on which had the most icing.

The same shop carried Black Forest Cake and dear to my heart, the chocolate advent calendar I shared each December with my older brother and sister. We took turns every third day. In the early years of my inclusion in the rotation, I innocently agreed to be the first to open a door, blind to the numerical implications of the splendid largest chocolate’s location on December 24. It didn’t take long to catch on though, and in later years I was jockeying for the third day alongside my more experienced siblings.
This year, I was hugely amused to see this same game play out between sisters Maddie and Juliana and their wooden Advent Calendar. In their case, the coveted door has a dog on the handle and is opened on December 19. Now nine and seven, respectively, they counted backwards to determine that Juliana would start the month and thus claim the prize.

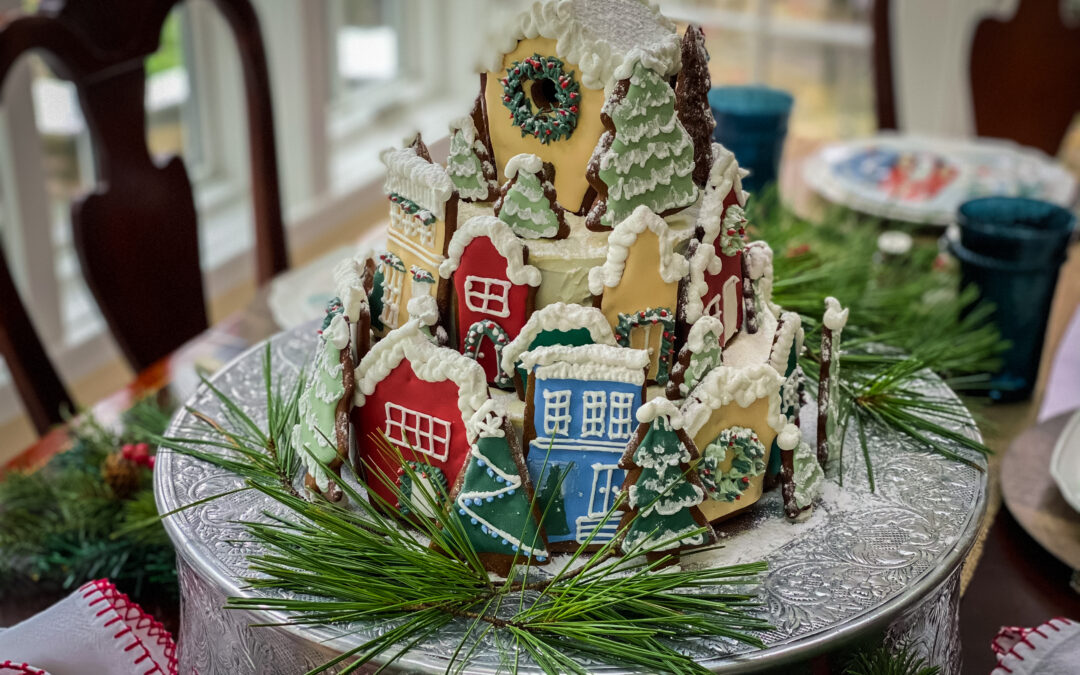
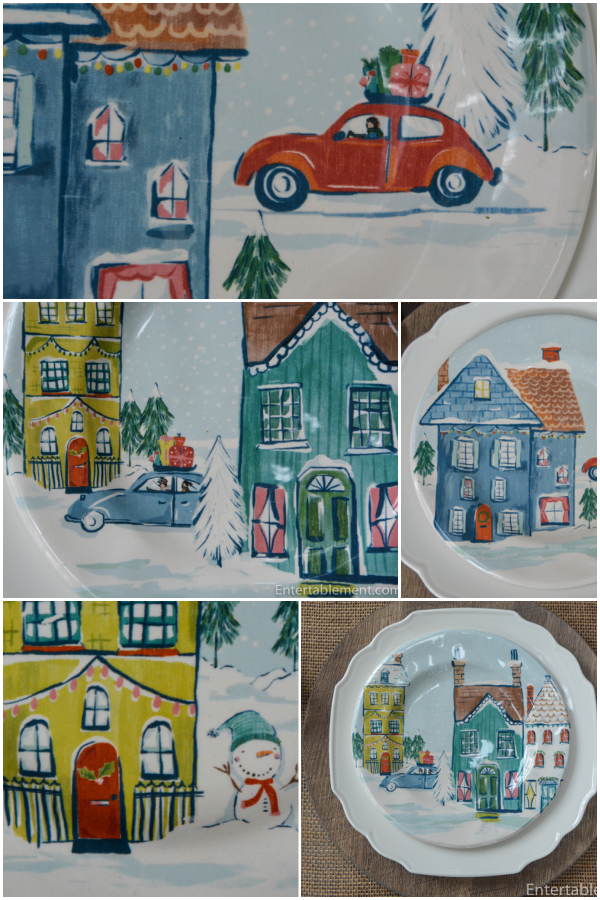
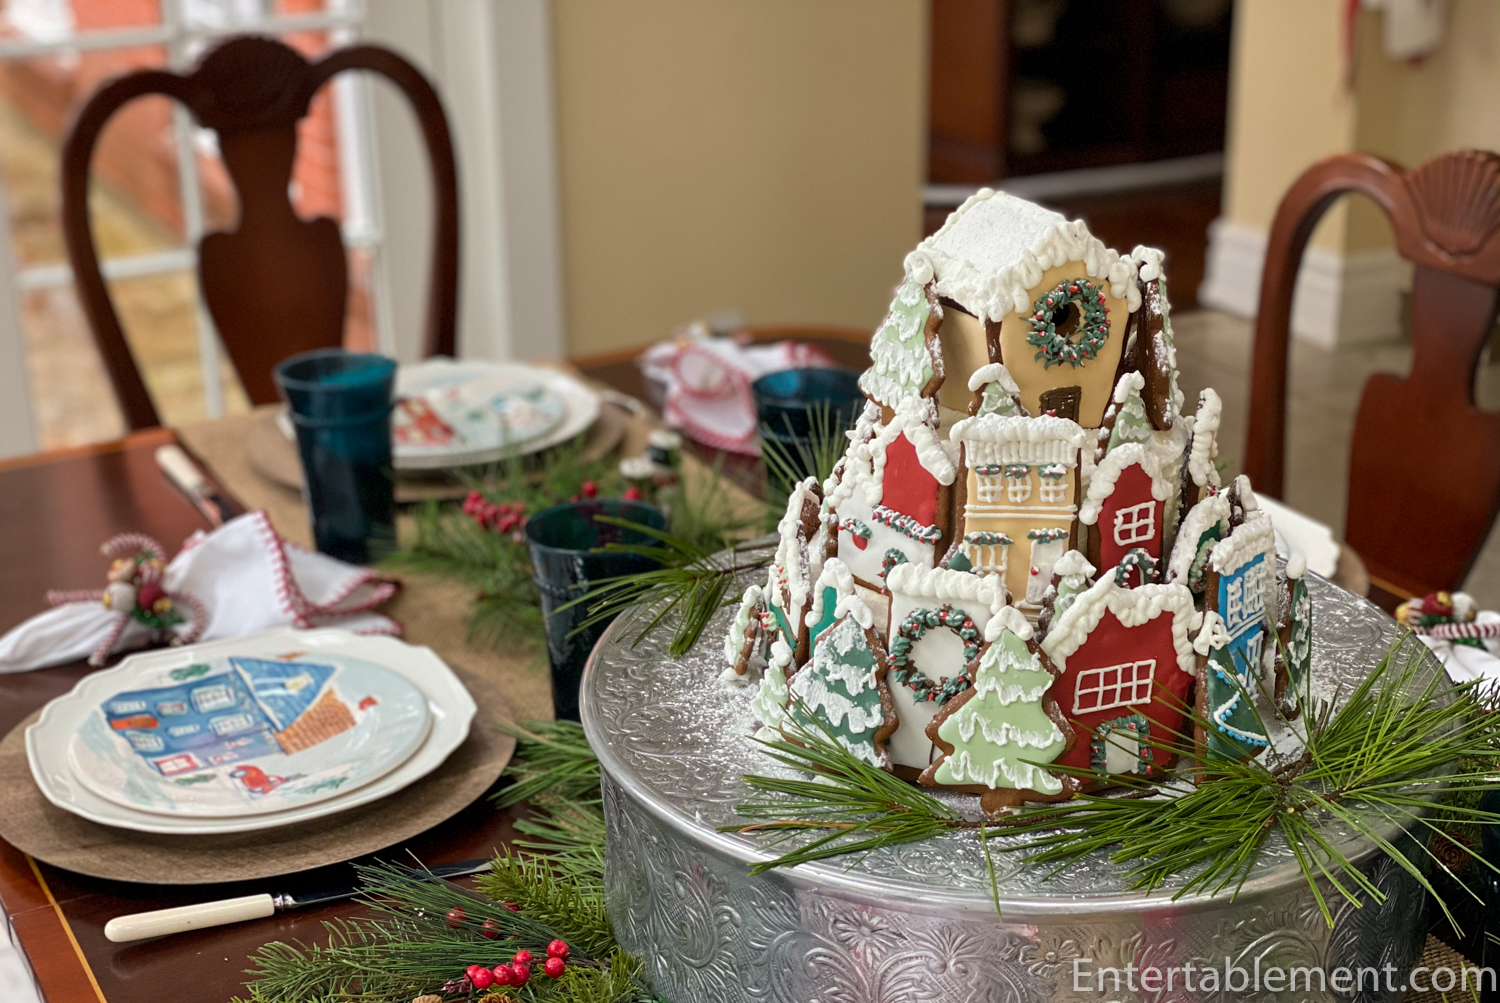
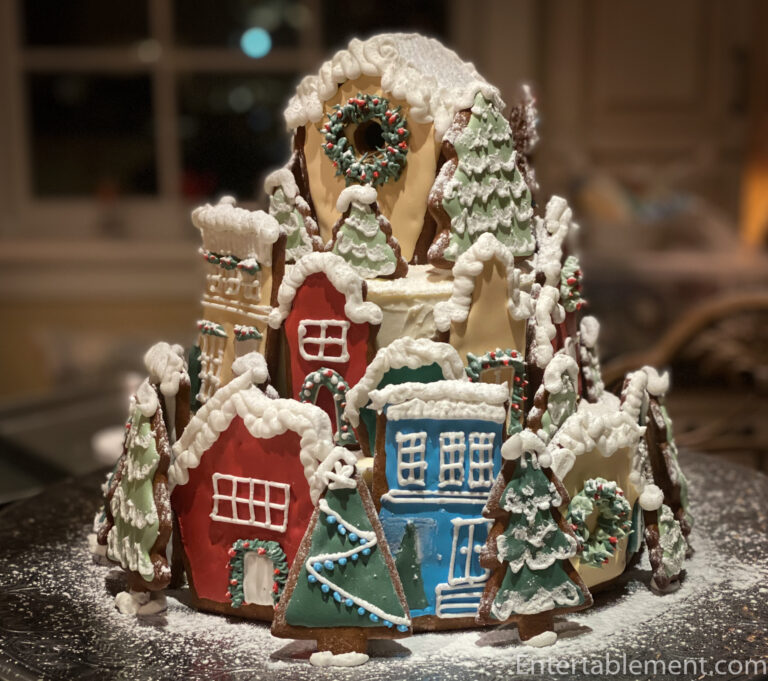
I still love gingerbread cookies, and couldn’t wait to make a batch of house-shaped ones to adorn this four-layer Gingerbread Village spice cake. The houses were inspired by a set of plates from Pier 1 last year. I had to set a table.
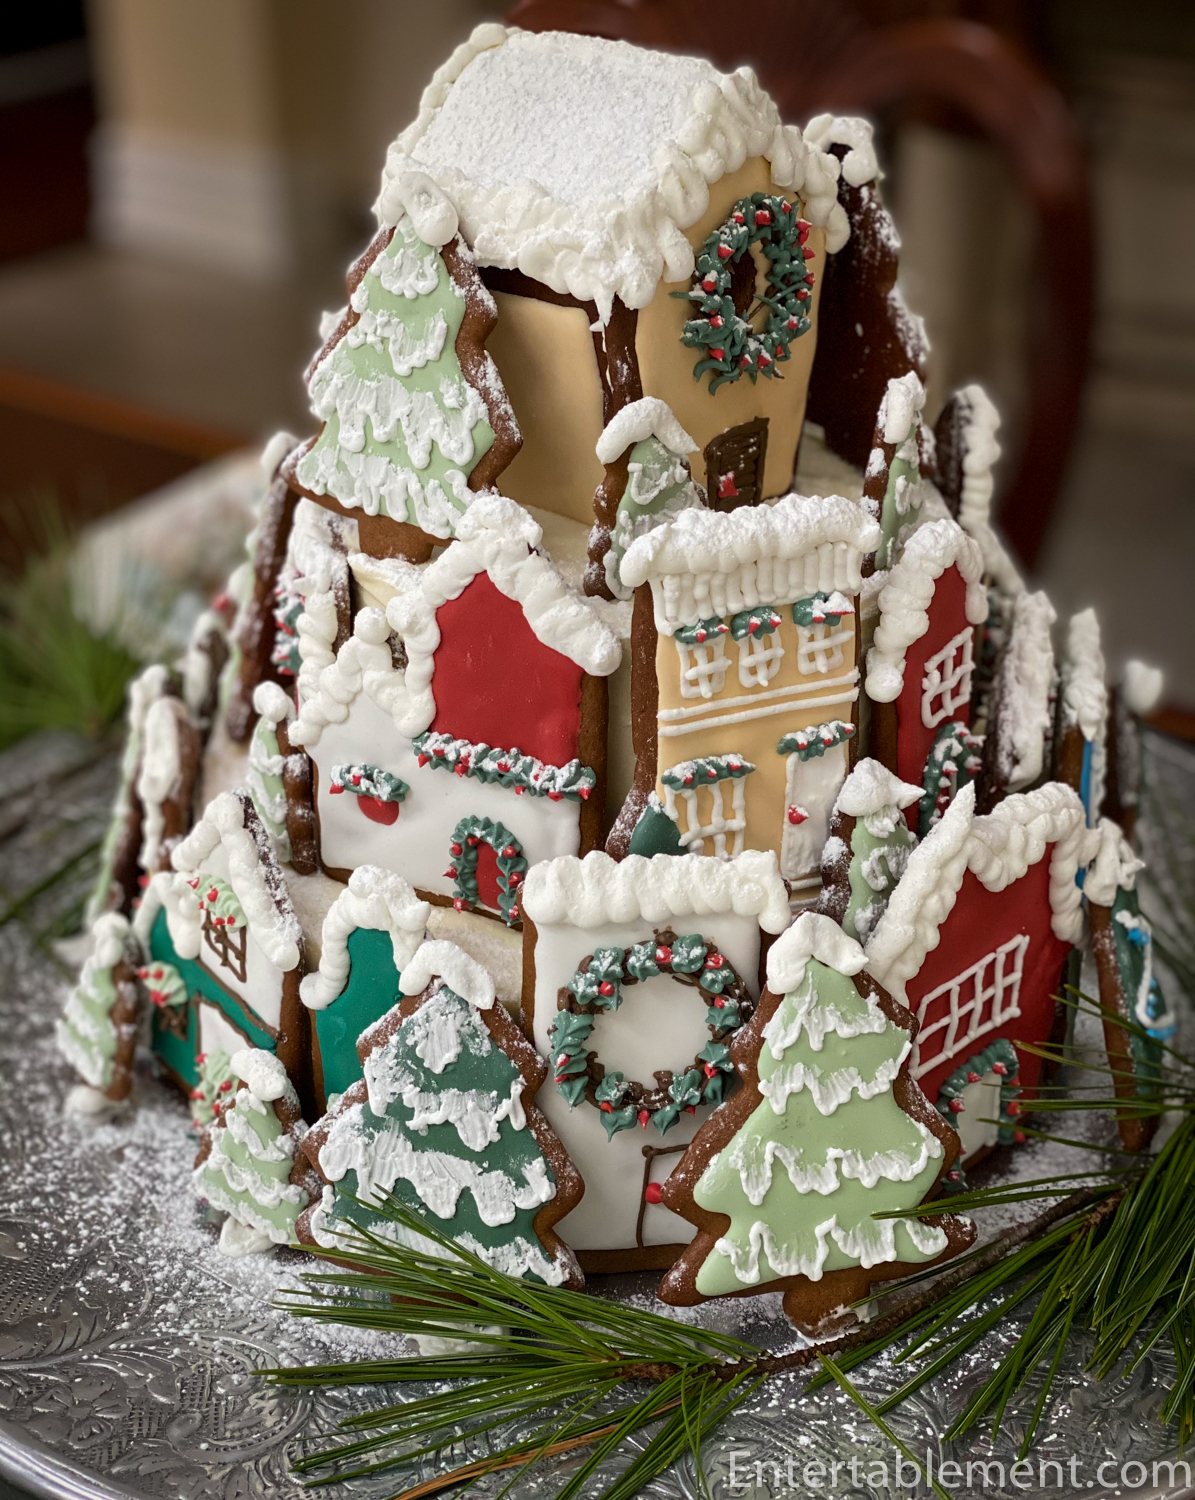
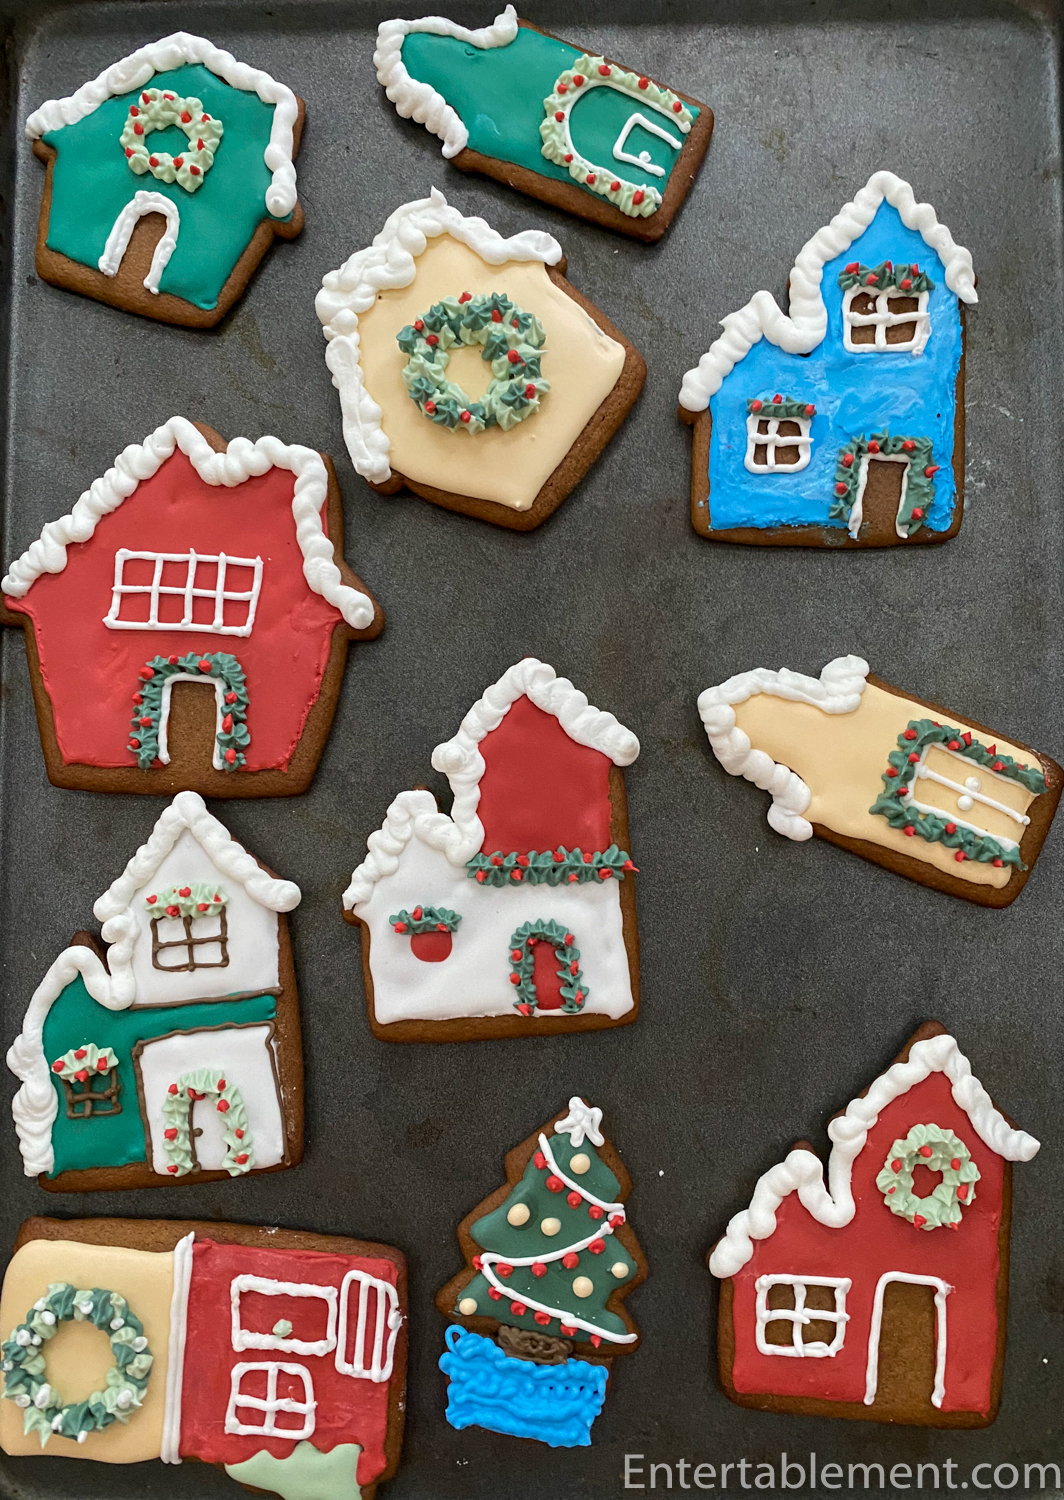
Constructing the cake was a multi-day affair. I made the cookies on the first day, applied outline and flood icing the next, let that dry overnight and decorated the cookies the following afternoon.

I baked and iced the cake on the final day. Applying the cookies to the outside of the cake was the final and fastest step.
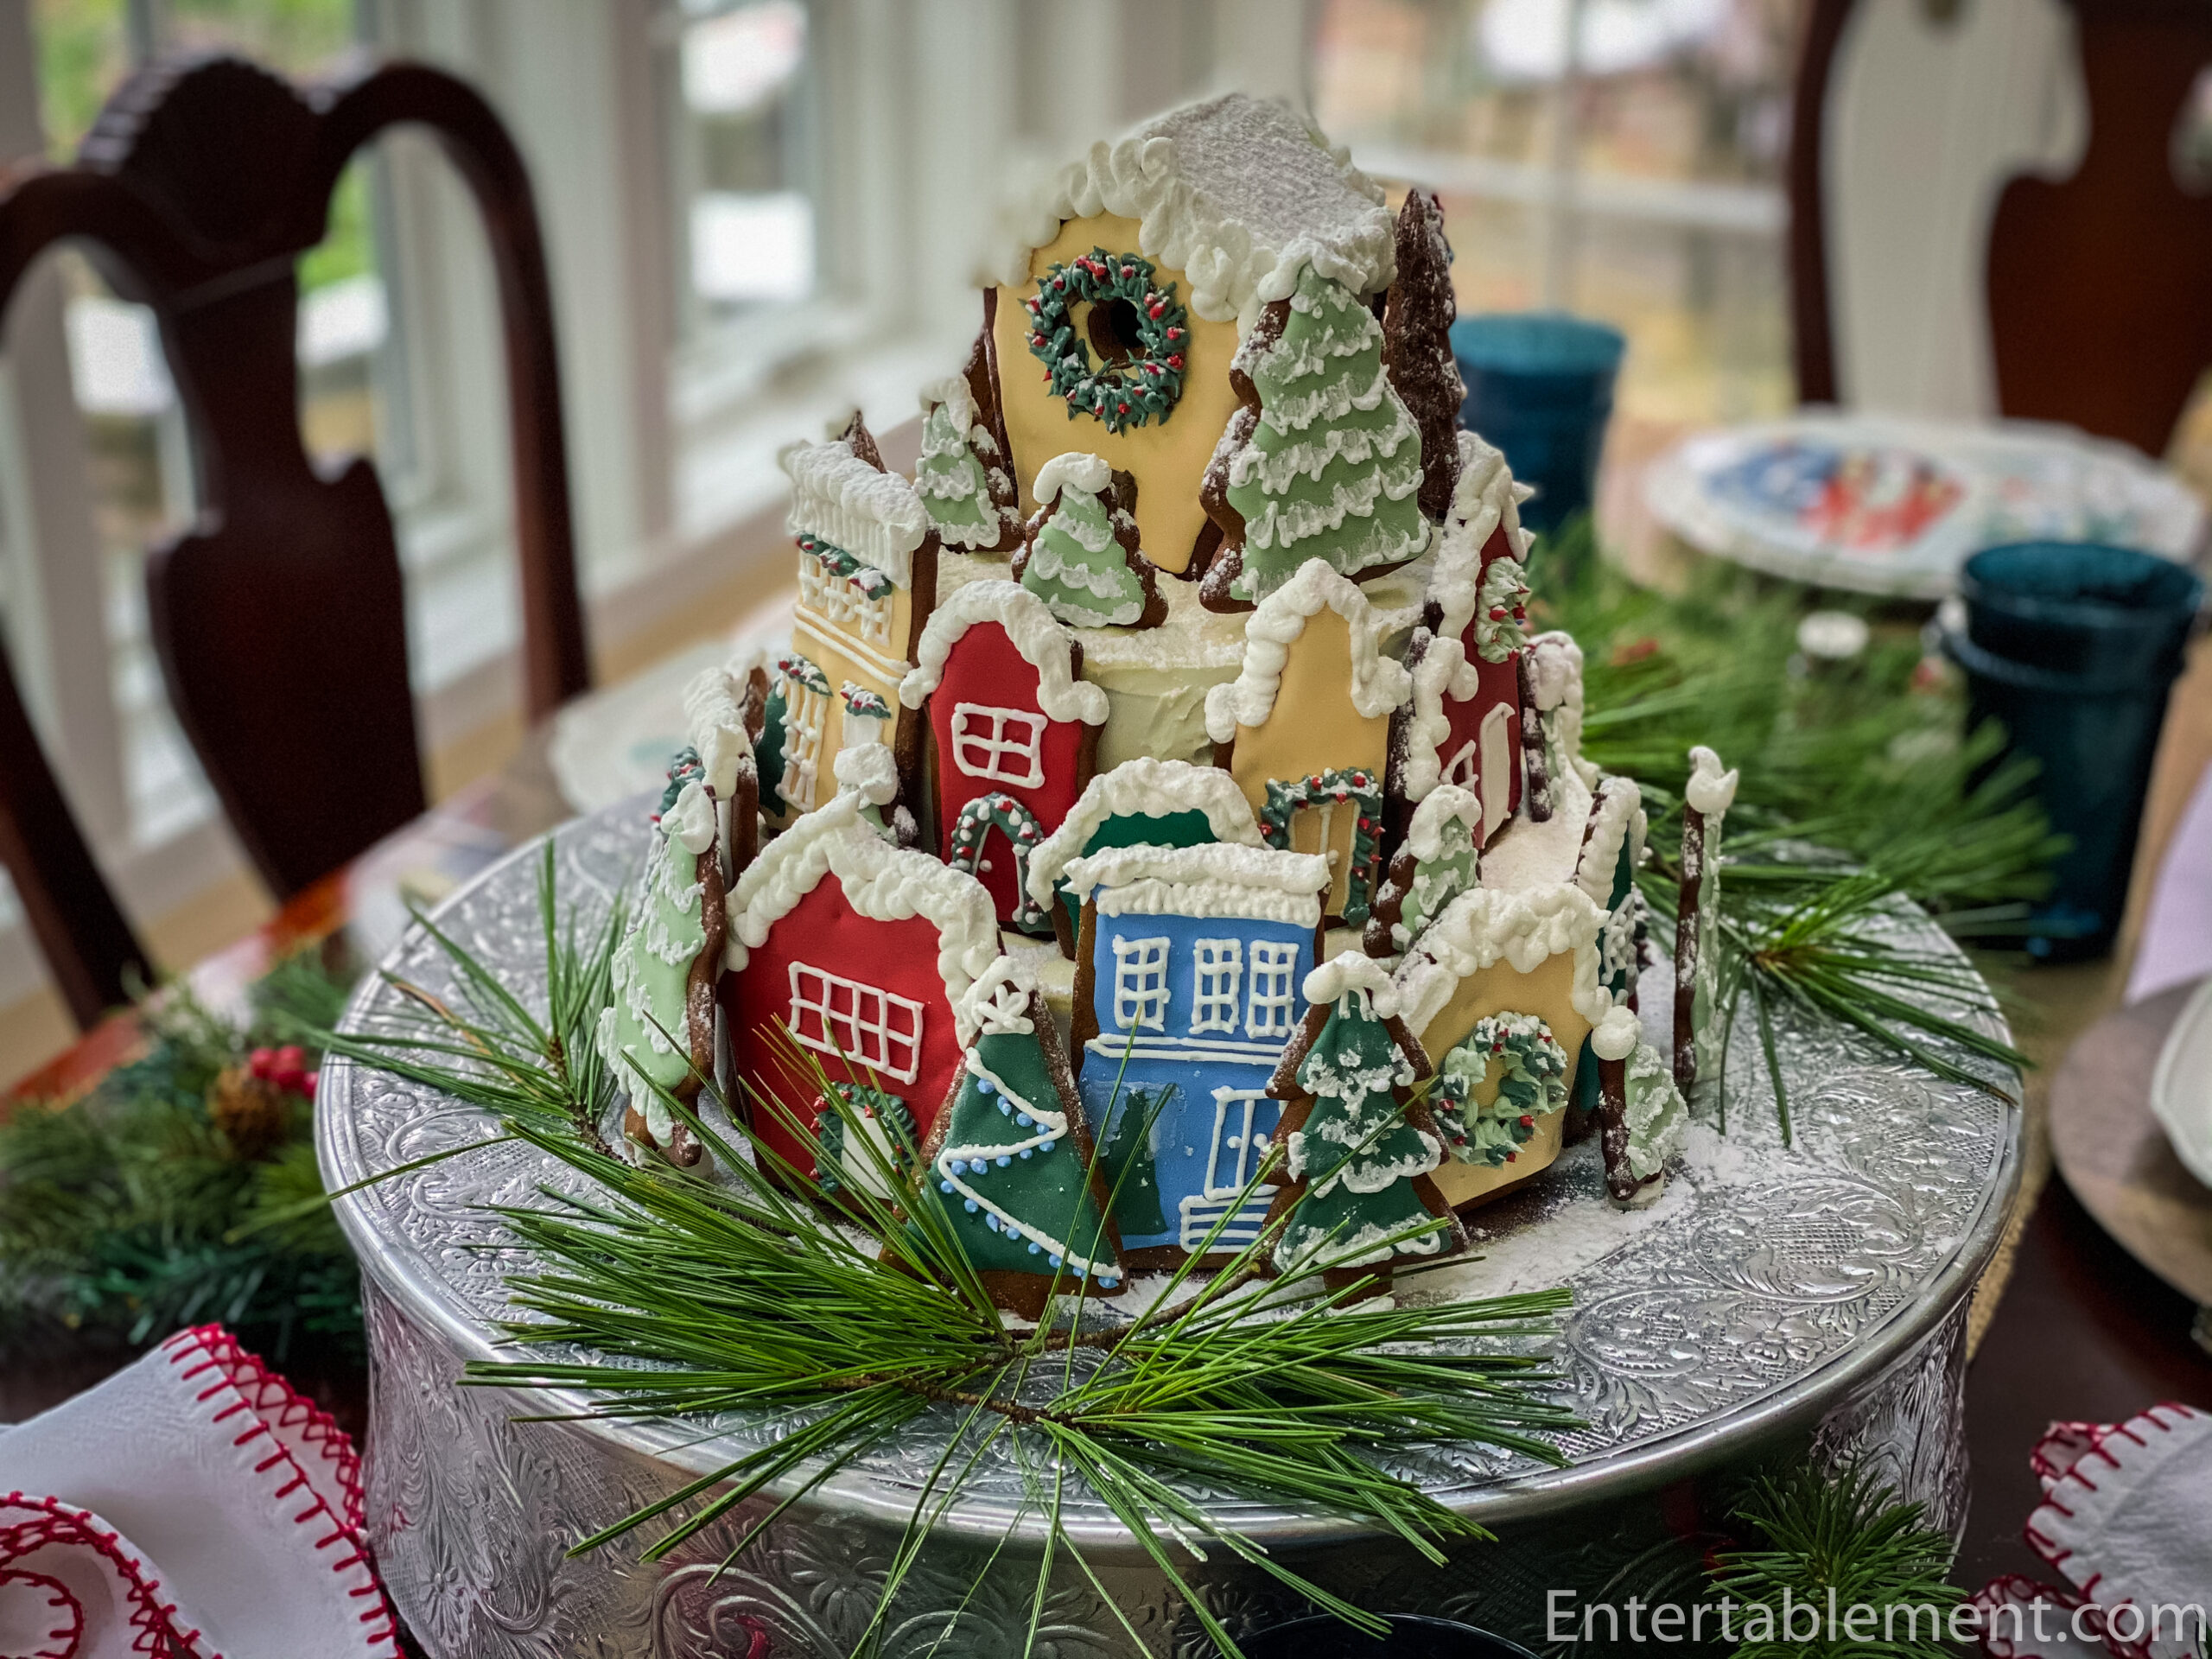
Table set, cake in place, photos done. Call in the troops! It was a huge hit with the grandgirls (and the parents, I might add).

A day later: all gone! How enormously satisfying. And delicious.
Gingerbread Village Cake
Ingredients
For the gingerbread cookies (adapted from King Arthur’s Bakery)
- 170g or 6 oz unsalted butter
- 160 g or ¾ c brown sugar, packed
- 255g or ¾ c molasses
- 450 g or 3 ¾c unbleached all-purpose flour
- 1 tsp salt
- 2 tsp cinnamon
- 2 tsp ground ginger
- ¼ tsp allspice or cloves
- 1 large egg
- 1 tsp baking powder
- ½ tsp baking soda
For the Royal Icing:
- 454 g or 1 lb confectioners’ sugar. sifted
- 27 g or 3 tbsp Meringue Powder
- 75 g or 5 tbsp warm water
For the spice cake (adapted from Preppy Kitchen)
- 420 g or 3 ½ c all-purpose flour
- 2 tbsp cinnamon
- 2 tsp ginger
- 2 tsp allspice
- ½ tsp cloves
- ½ tsp nutmeg
- 1 tsp kosher salt
- 1 tsp baking powder
- 1 tsp baking soda
- 360 g or 12 oz unsalted butter
- 400 g or 2 c brown sugar
- 70 g or 4 tbsp Lyle’s Black Treacle or molasses
- 6 eggs
- 30 ml or 2 tbsp vanilla extract
- 1 ½ c buttermilk
For the cream cheese frosting:
- 1 c (227 g or 8 oz) unsalted butter at room temperature
- 454 g (16 oz) cream cheese at room temperature
- 4 tsp vanilla
- 4 c (454 g or 16 oz) confectioners’ sugar, sifted
Instructions
Make the gingerbread cookies
- In a medium saucepan over low heat, melt the butter. Stir in the brown sugar, molasses, salt, and spices.
- Transfer the mixture to a medium-sized mixing bowl and let cool to lukewarm. Beat in the egg.
- In a medium bowl, whisk together the flour, baking powder and baking soda. Add to the molasses mixture. The dough will be very soft and sticky but will firm up once it’s chilled. Resist the temptation to add more flour.
- Divide the dough in half, and pat each half into a thick rectangle. Wrap well, and refrigerate for several hours.
- Using a rolling pin with height guides, roll out the dough to 1/6” thickness; any thicker and the cookies puff up too much and lose their shapes during baking. As I wanted very precise and sharp shapes for this application, I ended up rolling out the cookies individually between two 6” squares of parchment, gently removing the excess dough from around the cookie cutters before removing the cutters, then transferring each cookie on the parchment square directly to a sheet pan. A giant pain, but worth it.
Make the cake
- Position a rack in the center of the oven and heat the oven to 325°F Convection or 350°F. Prepare two 9-inch and two 6-inch round cake pans with butter, parchment lining, and flour, or if using a high-quality baking spray, apply just before filling the pans with batter. Tip: for level cake layers, apply soaked cake strips to the exterior of each pan,
- In a medium bowl, combine the dry ingredients.
- In the bowl of a stand mixer, beat the butter and brown sugar until light and fluffy (3 minutes). Add the eggs one at a time, then increase mixer speed to high until batter is light and fluffy (2 minutes). Add the vanilla, beat for another minute and scrape down the sides of the bowl.
- Beginning and ending with the flour mixture, alternately add the flour and buttermilk. Beat well after each addition. Scrape down the sides of the bowl and beat again briefly.
- Spoon the batter into the pans. Bake for 30 minutes, or until the cakes spring back when lightly touched. The larger cakes may take a little longer. Let cakes cool in the pans for 10 minutes, then turn them out onto a wire rack to cool completely.
Make the Royal Icing and decorate the cookies
- In the bowl of a stand mixer fitted with the paddle attachment, beat all ingredients together until the icing forms peaks (7 – 10 minutes). Let the icing set for at least an hour to let air bubbles rise. This icing will be the correct consistency for assembling the gingerbread house and for the decorative piping. Use gel colours of your choice for the houses.
- Thin the coloured icing to piping and flooding consistencies by adding warm water. (TIP: use a spray bottle of water for best control). Apply a thin bead of piping consistency icing to the perimeter of each cookie. Fill in with flood consistency icing. Let dry overnight before adding piped decorations.
- Keep icing covered with a damp towel or in a sealed container when not in use.
Make the cream cheese frosting and assemble the cake
- In the bowl of a stand mixer fitted with the paddle attachment, beat the butter and cream cheese on medium-high speed until fluffy and light in colour (2 minutes). Beat in the vanilla. Gradually beat in the sifted confectioners’ sugar and continue beating until fluffy (3-5 minutes).
- Level each cake layer as needed.
- Place one of the 9″ cake layers on a cake board on a turntable. Pipe a thick layer of frosting, and top with the second layer. Apply a crumb coat and refrigerate until firm (15-30 minutes). Repeat with the 6″ cake layers.
- Frost the cakes with the final layer of frosting, getting it as smooth as you can. Place the 6″ cake on top of the 9″ cake and refrigerate the assembled cake until firm (15-30 minutes).
- Arrange the iced cookies around the exterior of the cake layers, topping with the gingerbread house/birdhouse.
Supplies:
Cookie cutters:
- Most of the house and tree cutters are from Holly Fox Farm, on Etsy.
- The three-dimensional house on the top was from Amazon. That particular one s no longer available, but they have lots of kits.
I’m sharing this post with Between Naps on the Porch.

I have never seen a cake like that – amazing! My kids would’ve loved it too. Hope all is tickety-boo and you’re all staying safe.
We are all well here, Mike, and hope the same is true for you and yours. Eager to begin traveling again!
Absolutely beautiful, Helen! You are so patient and creative to make a cake like that. Hope you are both well.
So great to hear from you! All is well with us, Jayne. Miss you guys enormously.
We are looking forward to getting together when things open back up.
Wonderful!!!!!!!
Thank you!
Woweewowow! I don’t think I’d have the patience to do that.
I enjoy the challenge – there is so much to learn…