
Fresh, local summer fruit is beginning to appear at the farmer’s markets, but not fast enough to furnish a fruit pie, so I tapped into my stash of Trader Joe’s frozen mixed berries and cherries.
I had a hankering to play around with a complex latticework crust, and Buttermilk Pastry is my go-to for those. It handles beautifully and puts up with being rerolled a couple of times for cutouts.

A bunch of neighbours were gathering at the beach to watch the sunset, so I took the pie down to share. Apparently, it tasted as good as it looked because it lasted about 60 seconds. Glad I had pictures!


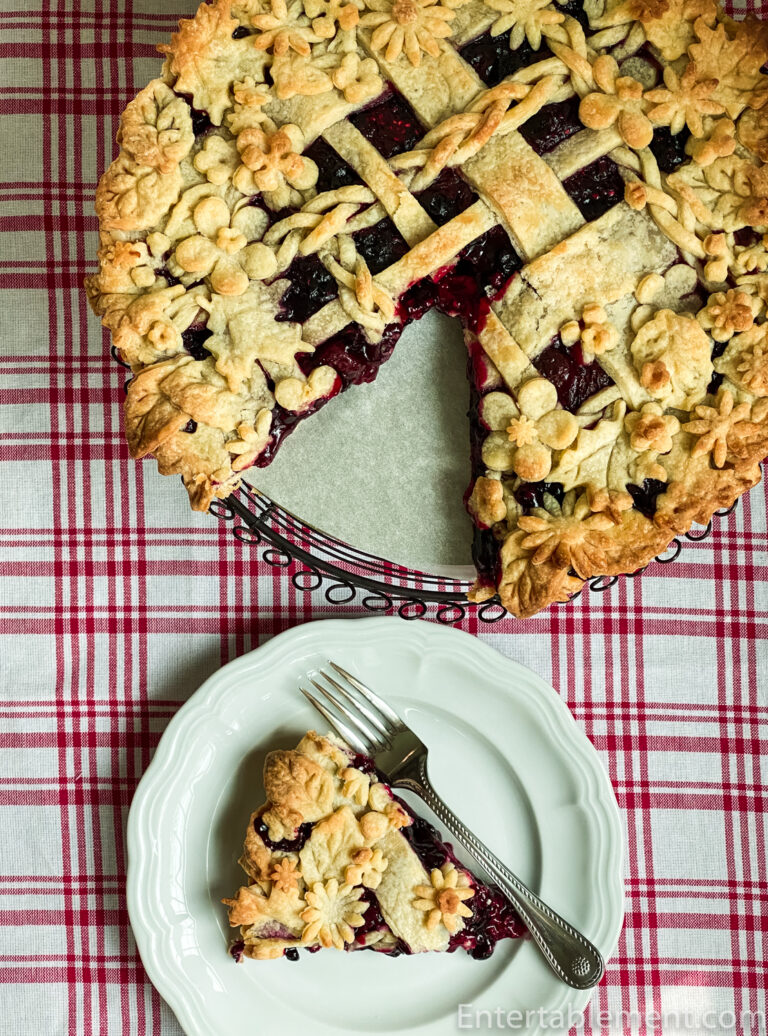
Mixed Berry Tart with Lattice and Flower Crust
Buttermilk pie crust is wonderfully forgiving, It shrinks hardly at all, a must with a complex pie crust. The filling is not pre-cooked, so your time can be devoted to making pretty patterns!
- Yield: Makes one 9" tart 1x
Ingredients
For the Crust
- Pastry for 9” double pie such as Buttermilk or Butter
For the Filling
- 765 g or 7–8 c fresh or frozen berries (cherries, raspberries, blackberries, blueberries, black currants)
- 30 ml or 2 tbsp fresh lemon juice (about ½ of 1 lemon)
- 100 g or ½ c granulated sugar
- 36 g or ¼ c ClearJel or cornstarch
Instructions
Make the filling
- If you’re using frozen berries, place them in a glass bowl and heat them briefly in the microwave until they’re just thawed. Stir in the lemon juice.
- In a small bowl, combine the sugar and ClearJel or cornstarch. Sprinkle it over the berries and lemon juice. Stir to combine.
Prepare the crust
- On a lightly floured surface, roll out one pastry disc to a circle 11″ in diameter and 1/8″ thick. Gently transfer to the pie tin, pressing the bottom into place before the sides. Tuck any excess pastry inside the rim and press to level it; cover with plastic wrap and place in the fridge. (You can use the leftover dough for decorative cutouts).
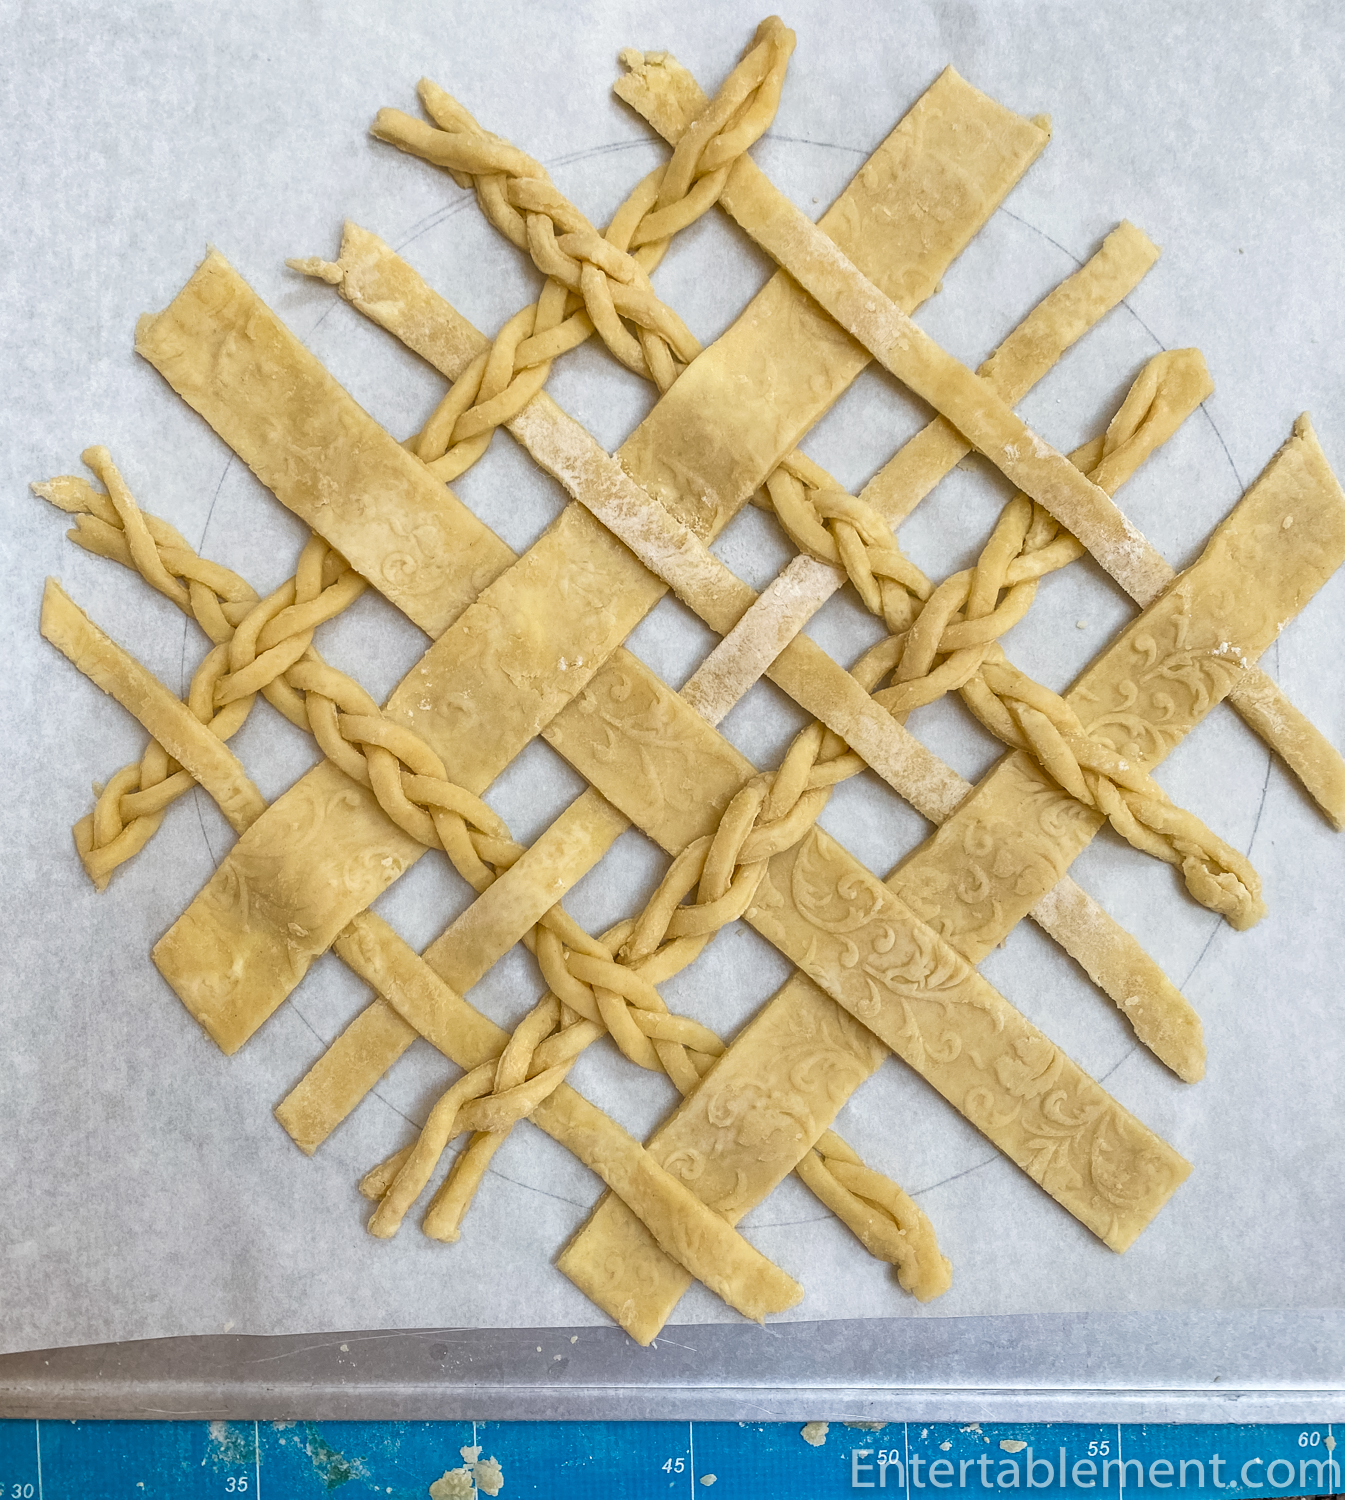
- Line two rimmed baking sheets with parchment. Roll out the second disc of pastry 1/8″ thick. If you’re using an embossed rolling pin for part of the design, apply it to the pastry on the final roll, just before you reach the 1/8″ thickness. Use a ruler and a pasta cutter to make long strips for the latticework. Create a mix of wide and narrow strips and braids. Work quickly to prevent the dough from getting warm; return the dough to the fridge to firm up when necessary. As you work, place them on the first baking sheet and refrigerate.
- Once you have enough strips prepared, use the leftover scraps for cutouts in the shapes of leaves (use a couple of different shapes) and various shapes and sizes of flowers. You may need to roll the dough a bit thinner to prevent excess thickness when layering. Dust each side of the chilled leftover dough with flour before applying the pie or cookie cutters. Place the cutouts in a single layer on the second parchment-lined sheet pan dusted with flour; position parchment paper between layers of pastry as needed. Place the cutouts in the freezer.
Assemble the pie
- Spread the mixed berries into the pie shell and level them with the back of a spoon or an offset spatula. Place the filled pie in the fridge.
- Using a pencil, draw a circle 9 “in diameter on a piece of parchment. Turn the parchment over.
- Remove the lattice pieces from the fridge and bring them to room temperature for a few minutes to prevent breakage. Layout your latticework design on the outline of the parchment paper, leaving an excess of ½” beyond the edges of the circle. For a traditional lattice layout, create 90° angles; for an argyle arrangement, try 45° angles. When satisfied with the design, lift onto another rimmed baking sheet and place in the freezer to firm up (10 minutes).
- In a small bowl, beat 1 egg with 1 tbsp of water.
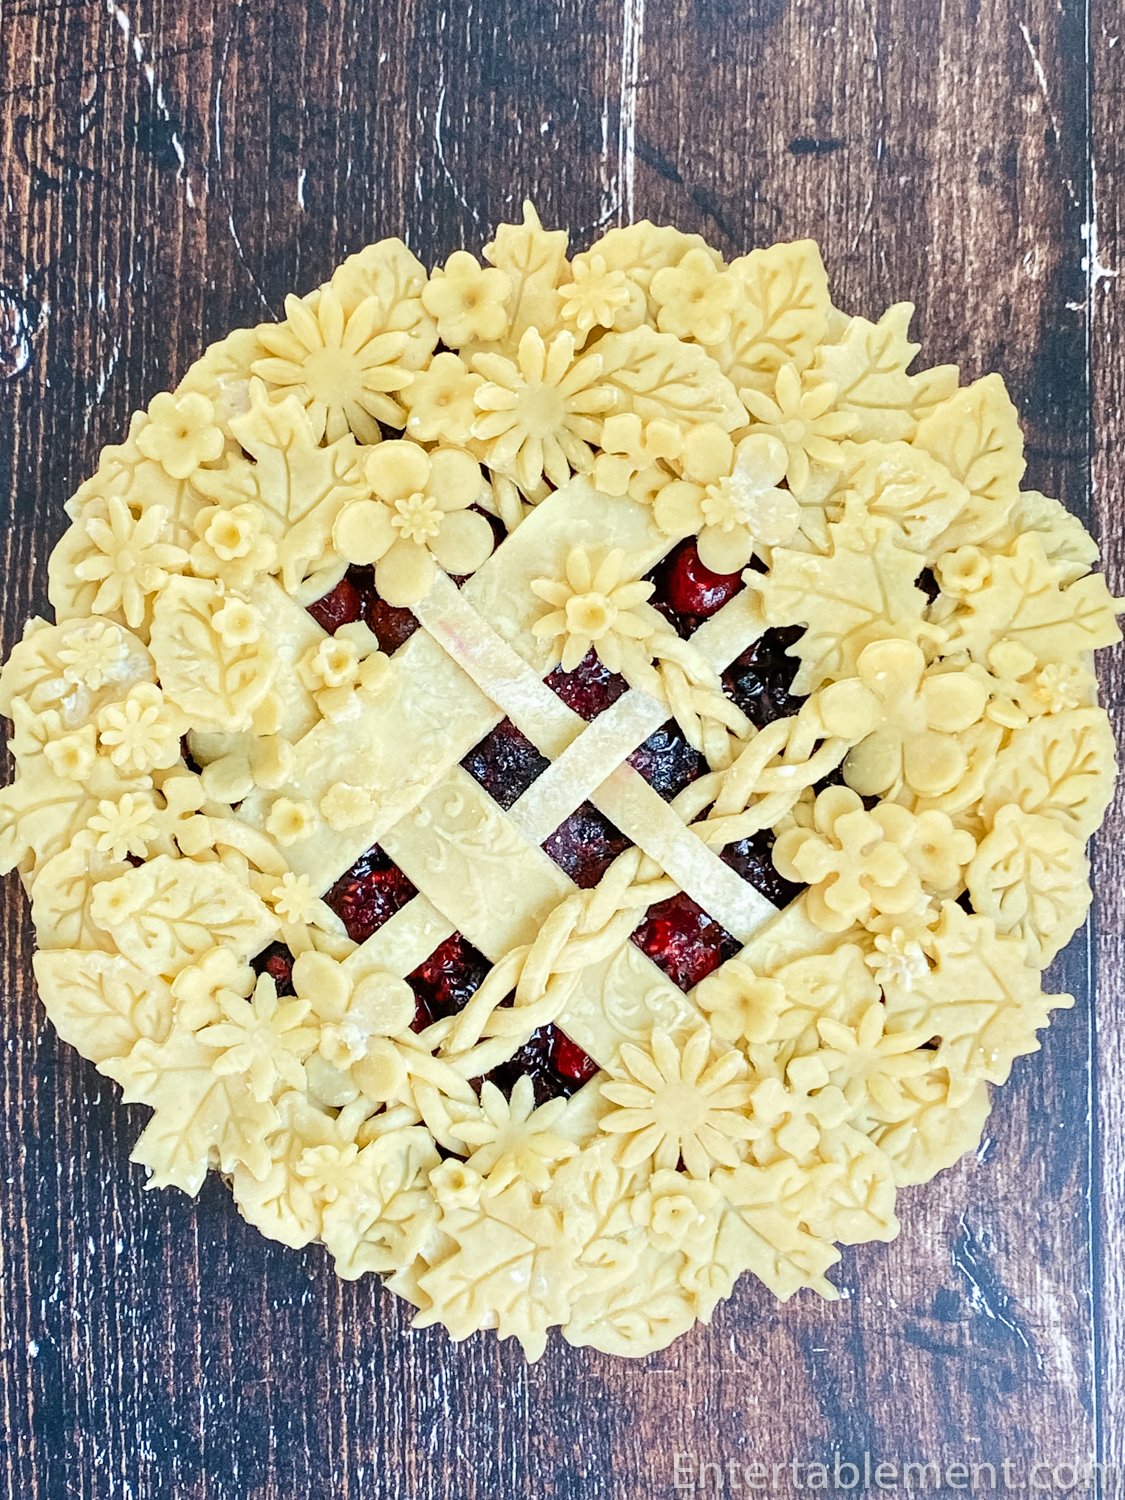
- Remove the filled pie shell from the fridge. Apply a very thin layer of egg wash around the rim of the pie using a small pastry or paintbrush. Slide the now-rigid latticework design onto the top of the filled pie and press down gently on the edges. Trim any overhang with scissors or a sharp paring knife.
- Brush the back of each leaf cutout with egg wash and place randomly or in alternate directions around the edges of the pie. Tuck various flower shapes into the leaves; try not to cover up too much of the latticework. You can stack differently sized flowers on top of each other, but try not to create too many layers, or the pie will bake unevenly.
- Place the finished pie in the freezer (20 minutes).
- Arrange a rack in the middle of the oven and preheat the oven to 425°F. (If you have a pizza stone or Baking Steel, use it).
- Just before baking, use a small pastry brush or paintbrush to apply a thin, even layer of egg wash; avoid pooling. If any pieces come unmoored, stick them down with a small dab of egg wash.
- Place the pie on a rimmed sheet lined with parchment; loosely tent the entire pie with foil, avoiding contact with the pie—Bake for 20 minutes. Reduce the temperature to 375°F and remove the foil. Finish baking until the filling is bubbling and the pastry is golden brown (about 60 minutes more). Rotate the pie and tent again with foil if it’s browning too quickly. Note: the filling needs to be bubbling briskly to ensure it’s cooked and the bottom crust is crispy.
- Let pie cool completely before serving (4 to 6 hours minimum).
Notes
Adapted from Judy Kim.nyc


Hi! What a gorgeous pie! My frozen berries doesn’t contain cherries. Can I add fresh cherries to the frozen mixed berries? Also, when do I had the corn starch? Thanks! I am eager to try this.
Hi Katherine,
Yes, you can add fresh cherries to the frozen berry mix. Whatever combo you want to use! And I’ve just updated the recipe to make it clearer. You add the cornstarch in Step 2 of “Make the filling”. Add the cornstarch or Clearjel to the sugar, then sprinkle it over the berries and lemon juice.
Good luck! 🙂