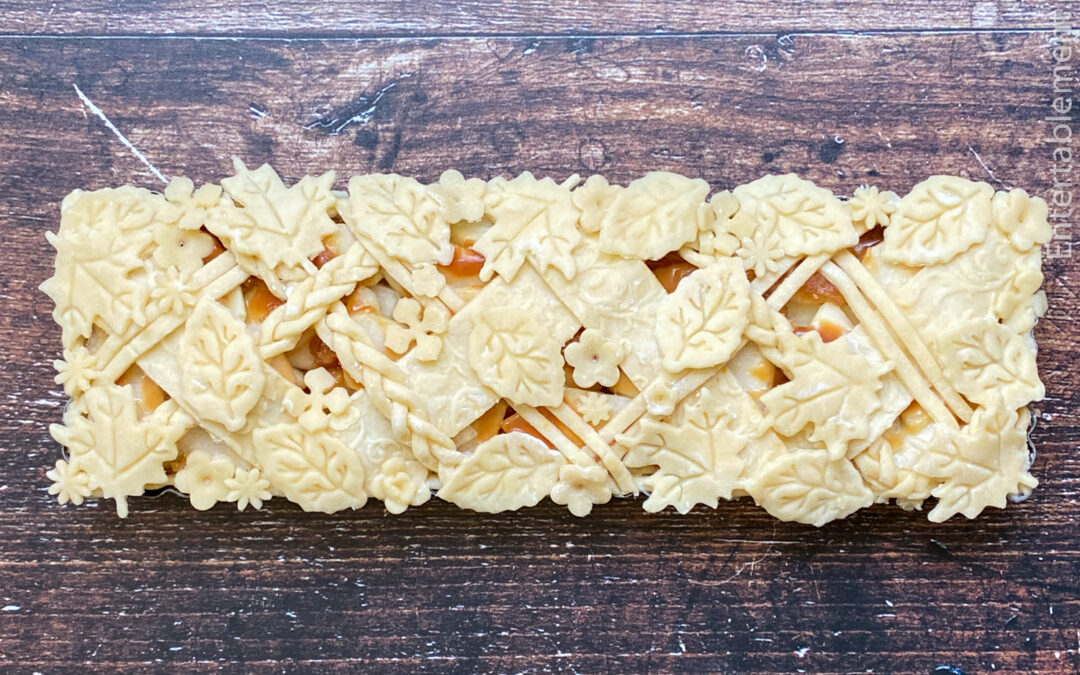
This recipe is excellent for making decorated pies with complex latticework or cutouts—it shrinks little, if at all. It’s extremely forgiving and easy to work with. Tender and flaky, it handles readily without getting awkward and testy. It’s my go-to whenever I want to make a “fancy” pie or tart.


Buttermilk Pastry
Get out your largest mixing bowl and enjoy the feel of the pastry coming together as you flatten each cube of butter and toss the pastry with an unexpected contributor—buttermilk! It makes for a fairly moist dough, so there is no need to fret about using additional flour to re-roll it. It handles readily without getting awkward and testy.
This tender and flaky pastry is perfect for pies with complex design elements such as textured latticework or cutouts. It’s very easy to work with. I often double the recipe; it’s great to have in the freezer, ready to go, for when the pie-making mood strikes.
- Yield: Two 8-10" pie crusts 1x
Ingredients
- 360 g or 3 c unbleached all-purpose flour
- 1 tsp kosher salt
- 25 g or 2 tbsp sugar
- 227 g or 8 oz unsalted butter, preferably European-style butter, cut into ½” cubes and chilled
- 112 g or ½ c buttermilk, in a pouring container, chilled
Instructions
- In a large, deep mixing bowl, combine flour, salt, and sugar. Allow the cubed butter to come to room temperature for a few minutes, then add it all at once into the flour mixture. Toss until each piece of butter is coated. Using your hands, smear each cube into the flour by pressing it between your index finger and thumbs while using a slow snapping or sliding motion, creating large, flattened shards of butter covered in flour. Ensure no large pieces of butter are left; the mixture will look shaggy.
- Using your hands, level the flour mixture and create a small well in the centre. Drizzle small amounts of chilled buttermilk all over the centre of the flour. Toss the mixture from the sides to the top, keeping the liquid away from your hands and the sides of the bowl. Ensure each addition is fully absorbed before adding more. Keep tossing and mixing with your hands until the mixture starts coming together. Squeeze it together to test the consistency; it should just stick together.
- On a lightly dusted work surface, knead the dough 5 to 7 turns until it forms a ball. The dough will be slightly wet so add flour as needed to prevent sticking. Knead it until it’s smooth and all the loose bits are incorporated. (It’s very forgiving, so don’t be afraid of it). Form the dough into a large ball and coat lightly with flour. Cut the dough into two pieces in a 1/3 to 2/3 ratio. Place each piece cut side down onto its own piece of plastic wrap. Form the smaller piece into a flattened round about 1′ thick and tightly wrap it; it’s ideal for the base of your pie. Form the larger piece into a 1″ thick flattened rectangle and tightly wrap it; it’s for the top and decorative pieces for the pie. Chill the dough for at least 20 minutes, preferably an hour. Bring the dough to room temperature for a few minutes before using.
Notes
Recipe courtesy of Judy Kim, food stylist, recipe developer and pie maker extraordinaire.


