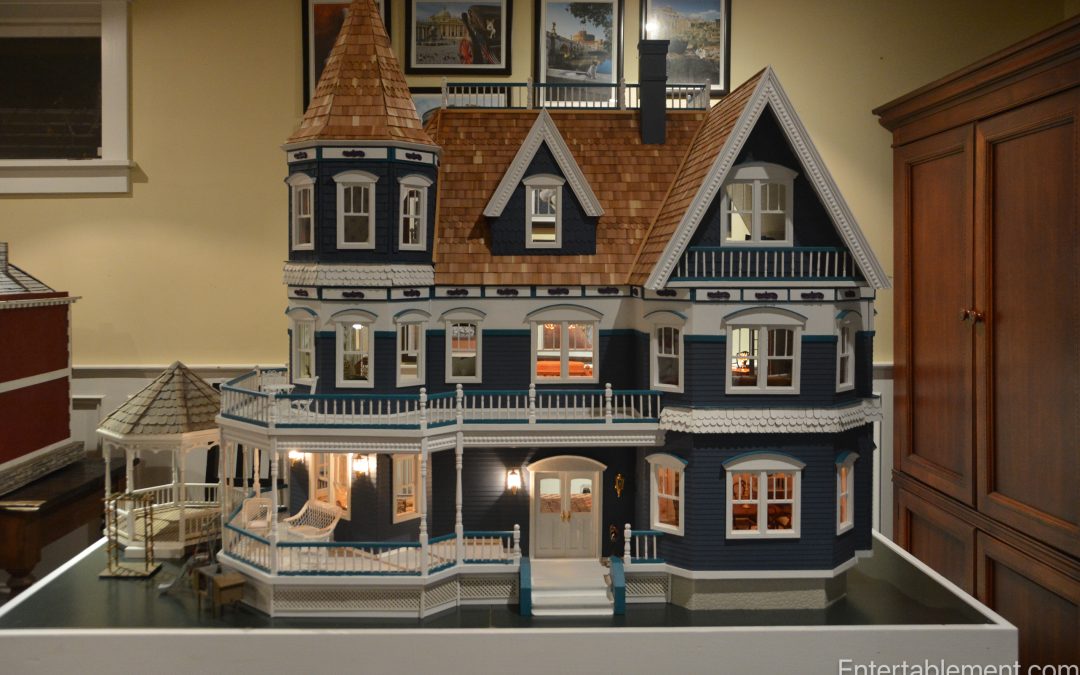
The Queen Anne Dollhouse — and How We Got Here
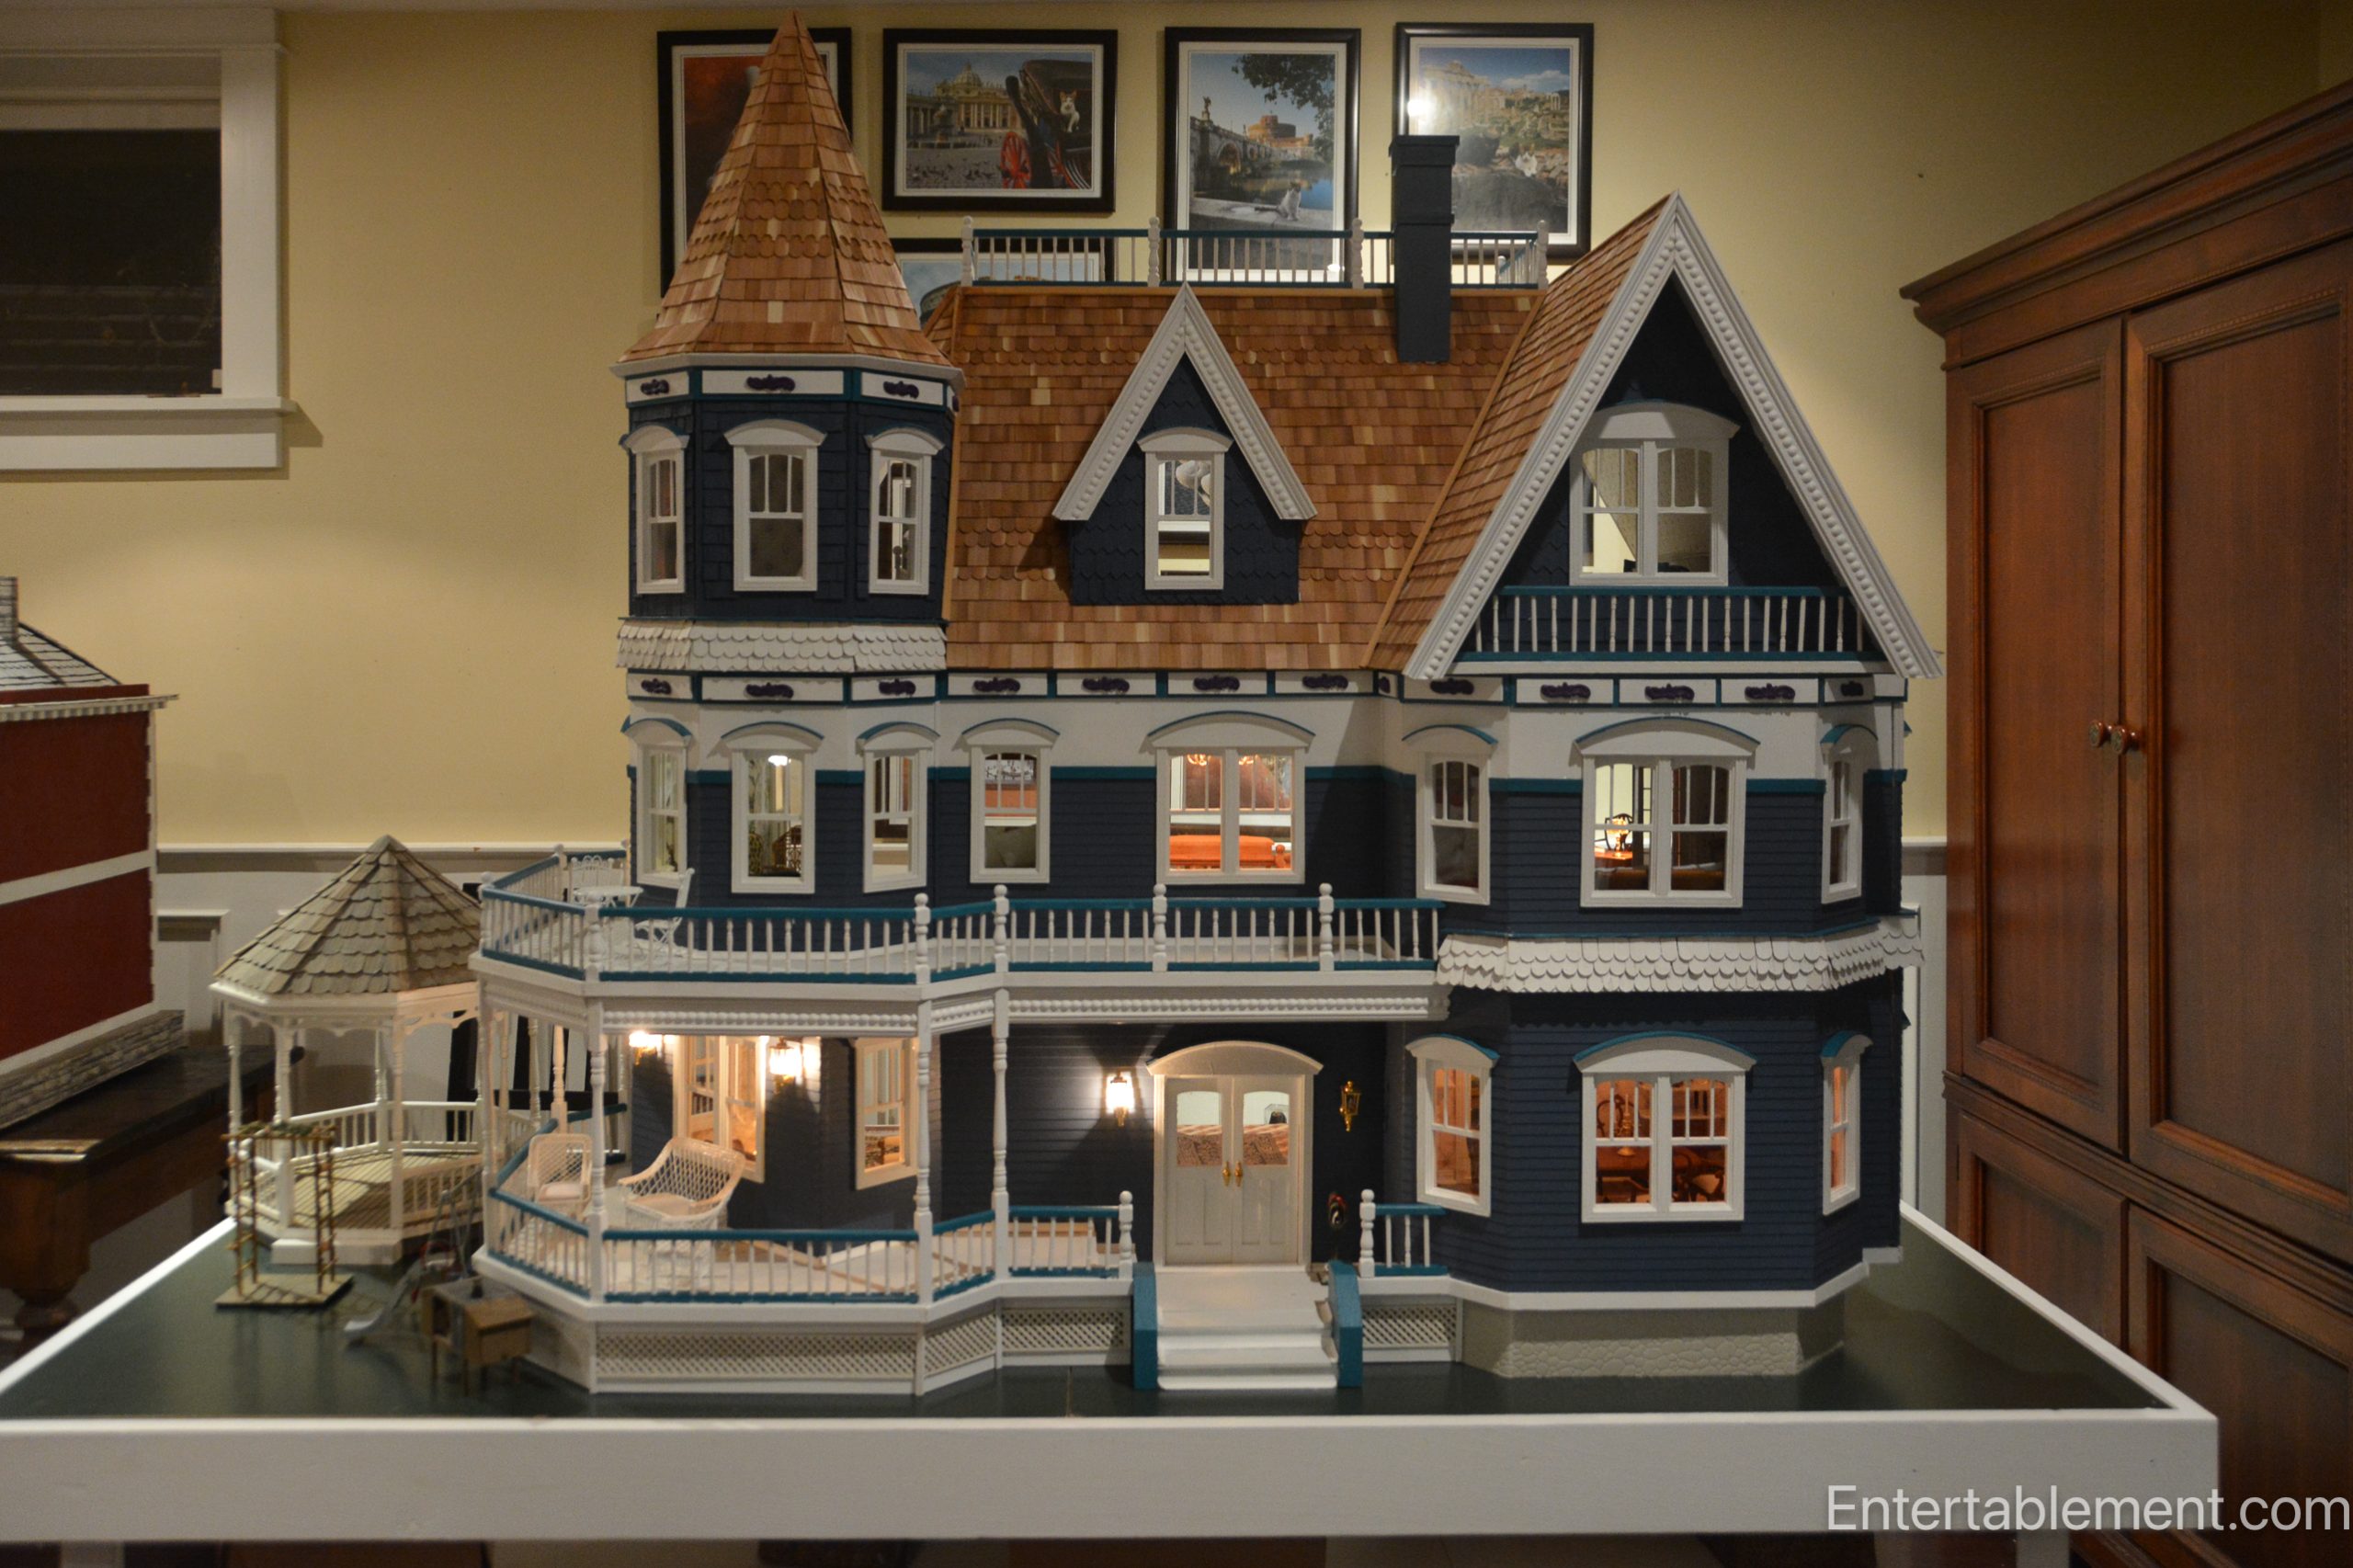
At long last, the Queen Anne dollhouse is finished — with the sole exception of the weathervane, which is currently somewhere between here and the postal system’s sense of humour.

Trim is complete front and back, the porch lattice is in place, and the foundation has been given a bit of faux-stone dignity.. At this point, I’m calling it done.

What makes this dollhouse especially satisfying is not just the end result, but the very long arc that led to it.
Where It Began
When Lauren was about seven, she noticed a wooden dollhouse that my grandfather had built for me for my seventh birthday.

There was no kit involved — he worked from a plan, cutting plywood by hand and constructing a Georgian-style house with four rooms on each side, divided by narrow central hallways.
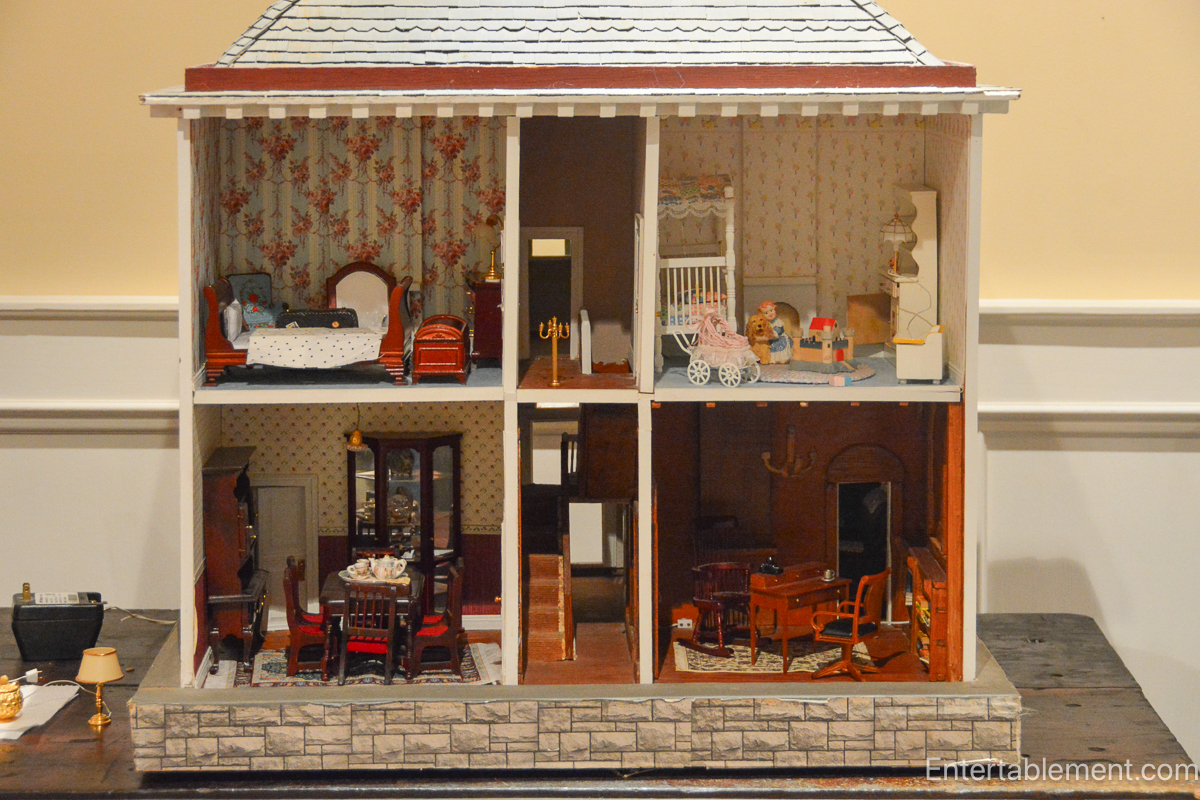
Each room measures roughly 9″ x 9″, which gives the whole thing a slightly curious scale — not quite standard, not quite miniature.Lauren had no interest in dolls, but immediately claimed it for her Puppies in My Pocket families.

At that point, Glenn stepped in. He built new doors using tiny pieces of trim, wired the house for lighting, and shingled the roof. I wallpapered, painted, and furnished it.


By the time we were finished, Glenn mused aloud about what it would be like to build a full-sized dollhouse — the original always felt just a bit diminutive, almost as if it were three-quarter scale.

As it turns out, that instinct wasn’t wrong. Over the years I’ve found smaller furniture that fits the original house far better, and we’ve been gradually swapping pieces out.

Seeing Grandpa’s house now beside the Queen Anne really brings that difference into focus — and it makes both houses more interesting for it.
Let’s Get This Finished
We purchased the Real Good Toys kit for the Queen Anne in late 1990s from The Little Dollhouse Company in Toronto. Glenn began the project with enthusiasm, but life intervened. We were both working full-time, had four children between us, and time was in short supply. The project stalled, Lauren’s interests moved on, and the Queen Anne spent the next few decades quietly collecting dust.
When we picked up the Queen Anne project again in earnest in early December, I’m fairly certain neither of us truly believed it would be finished before the year was out. Glenn, in fact, flatly refused to even contemplate that idea.
Me? Well. Hold my beer. 🍺

What we confronted on December 3 was daunting. It was still very much a wooden shell— exposed walls, and a roof that looked more like a geometry problem than a house.
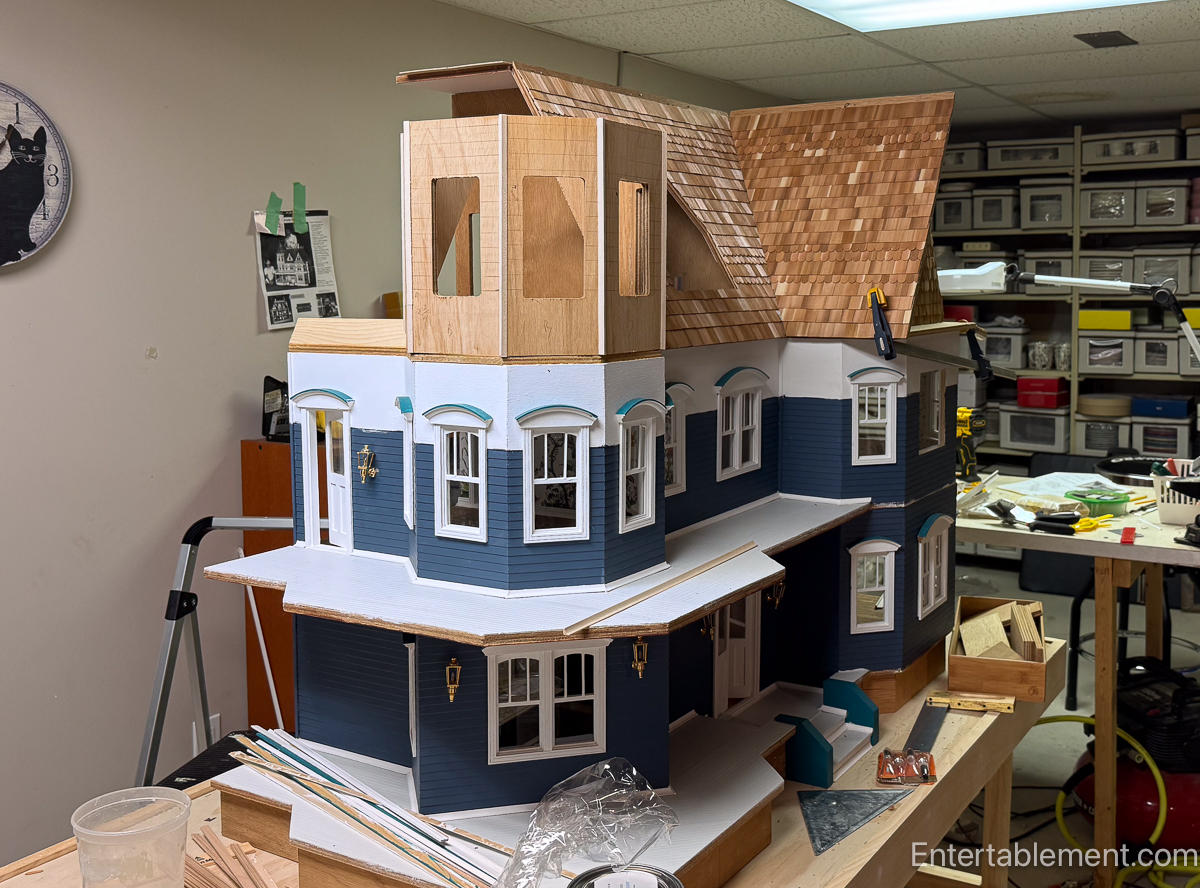

Somehow, in just three weeks, it became enough of a fully realized, Queen Anne shingle-style house with wraparound porches to present to the girls on Christmas Eve.
The railing around the widow’s walk and the foundation coverings were still missing, but it was good enough to play with.


Today, the only thing still in transit is the weathervane for the top of the turret, which feels like a perfectly reasonable loose end.

Watching a House Take Shape
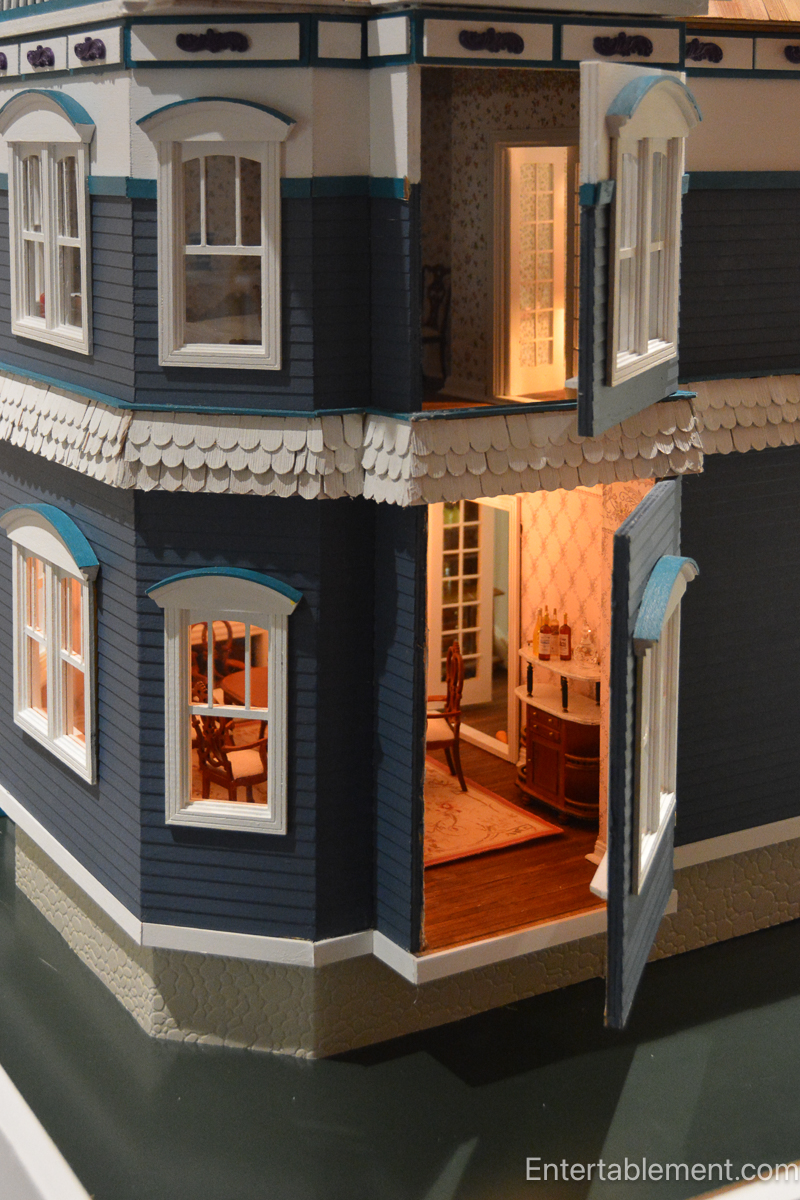
One of my favourite parts of this project has been watching the exterior come together layer by layer. Queen Anne architecture is all about personality—turrets, gables, varied rooflines—and this house has them in abundance.
As the cedar shingles went on, the character of the house suddenly emerged.

A Build From Another Era
One thing worth noting about this project is when it began.
The Queen Anne kit dates back to the late 1990s, and that shows most clearly in the instructions—or rather, the instructional philosophy. This was very much a pre-YouTube, pre-forum, pre-“let me just Google that” era of dollhouse building.
What we had were two paper manuals.
The first was written for vendors and assumed the house was being constructed as a finished shell for resale, leaving the final decorating to the purchaser. The second manual was… supplementary. Between the two of them, you were expected to bounce back and forth, cross-reference constantly, and fill in large gaps with optimism and guesswork. Neither manual was complete on its own. Together, they were still aspirational.
There was a lot of winging it.
Some sections—particularly the tower roof—were spectacularly under-explained. The roof is octagonal and fitted onto the platform in two parts, rather like a witch’s hat. The instructions suggested taping the pieces together and then “fitting” them onto the platform.
Very helpful. Not.

I’ll spare you the full saga, but suffice it to say that much of this build relied on problem-solving, test fitting, undoing, redoing, and the occasional muttered remark about instruction writers who had clearly never tried assembling their own product.
In some ways, though, that’s part of the charm. This house wasn’t assembled by following a tidy checklist—it was figured out. Slowly, sometimes stubbornly, and often with a fair amount of improvisation.
Which makes seeing it finished all the more satisfying.

The Case of the Missing (and Misleading) Shingles
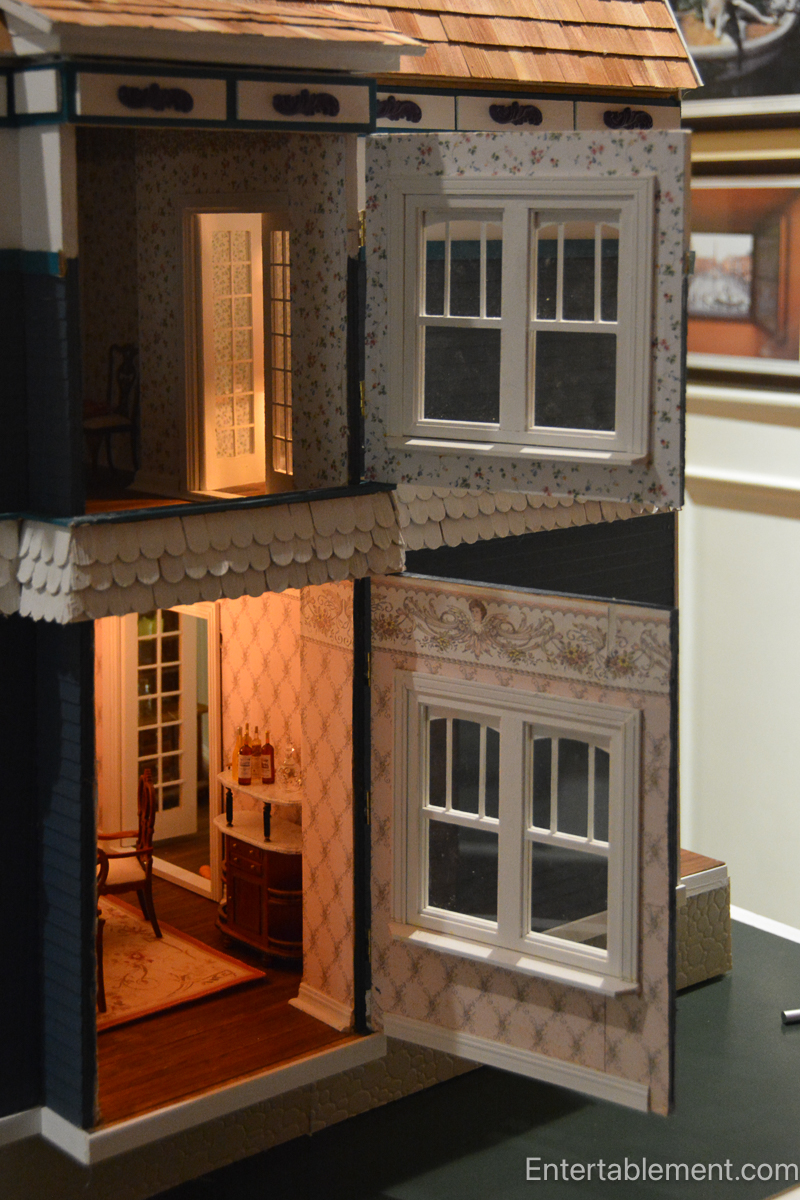
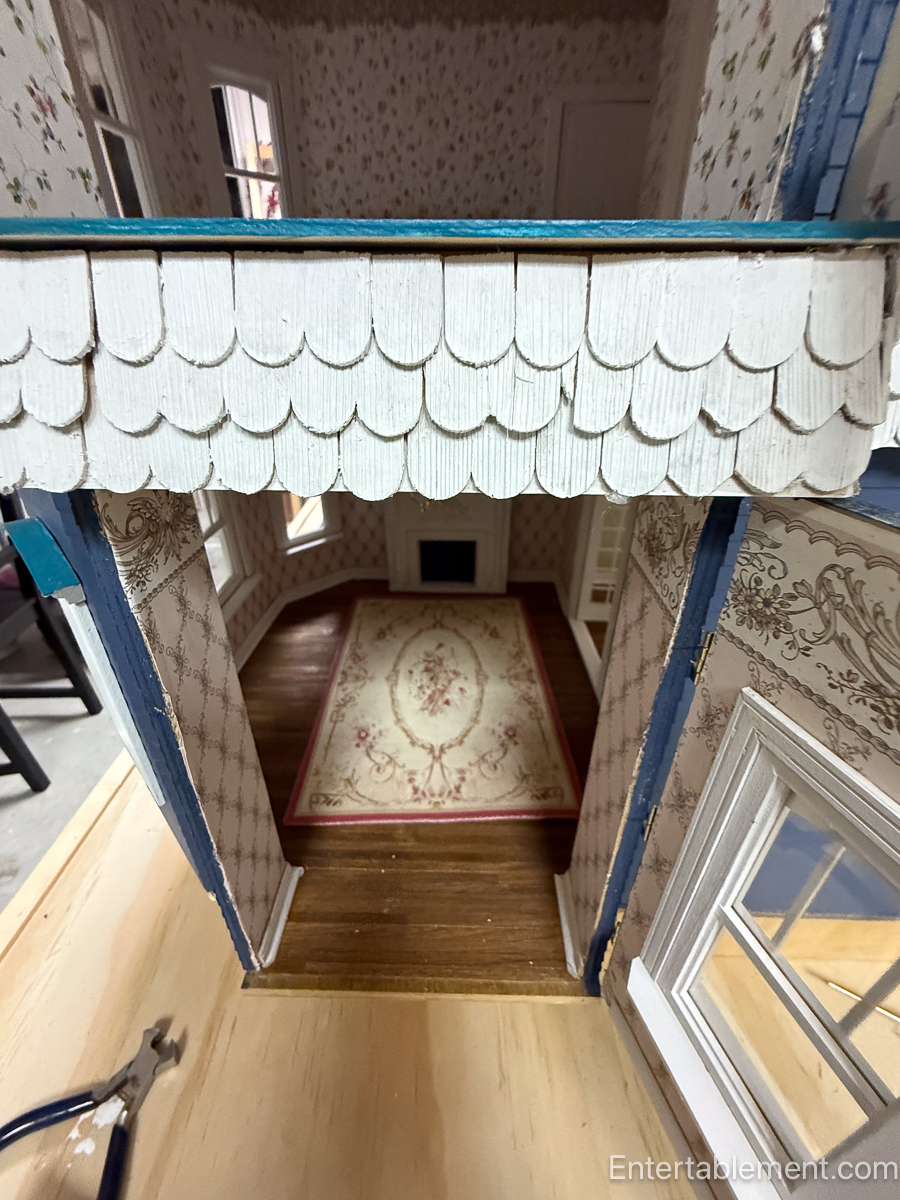
The “skirting”—the white trim pieces with the three rows of fish-scale shingles in the centre—arrived in a separate package, along with a loosely worded list describing where the pieces were meant to go. Also included: a small bundle of short fish-scale shingles.
What the instructions did not explain was that these short shingles were intended only for the top row of the skirting. There was no diagram. No warning. No note to say, “Do not merrily apply these everywhere or you will regret it.”
I assumed—reasonably, I thought—that there simply weren’t enough shingles supplied to complete the job.
I was right. Just not for the reason I expected.
To make matters worse, I hot-glued the shingles to the wrong side of the trim pieces. This discovery was made after everything had been painted, of course. The solution involved a heat gun, careful prying, and a great deal of patience, followed by reattaching every single shingle on the correct side.
At which point we officially ran out of fish-scale shingles. The fix? I made more. Using a Dremel, I filed the points off standard shingles to mimic the shorter version. That particular side adventure consumed an entire day—one spent not building the dollhouse so much as manufacturing replacement mistakes.
Oy.
Why Dollhouses Endure
Dollhouses are for all sorts of people. They always have been.
Lauren was never a traditionally “girly” child — her adult Playmobil collection of helicopters and tanks is frankly astonishing — but miniature houses exert a pull that seems to cut across age, gender, and personality. There’s something about a complete, ordered world at a human scale that feels both comforting and endlessly absorbing.

I recently came across a woman on Instagram who built a dollhouse for her son for Christmas. He had several open-heart surgeries as a baby and is developmentally delayed. She and her husband filmed him discovering the house — it was genuinely moving, not performative, and the comments reflected that. It was a quiet reminder that miniature spaces can offer joy, calm, and fascination in ways that don’t need explanation.
The Queen Anne, at Last
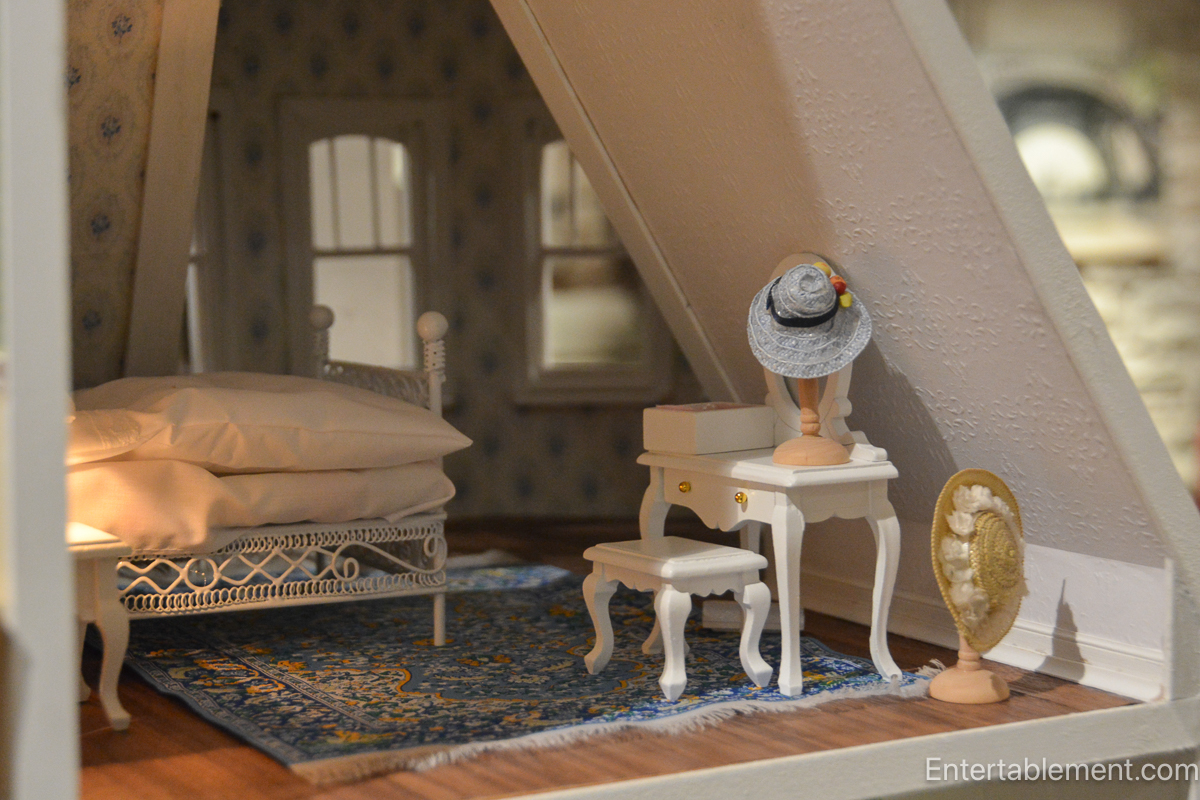
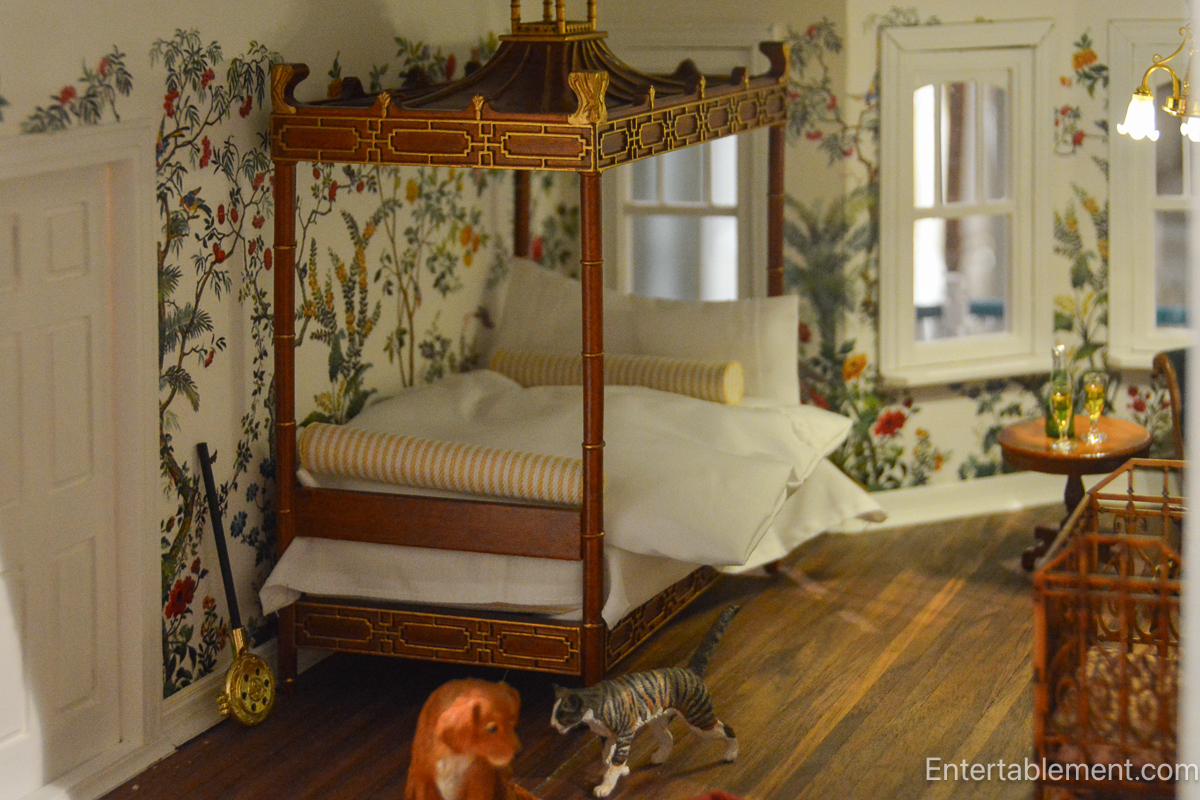
The Queen Anne house has been a slow burn — years of incremental work, long pauses, returns with fresh eyes, and the inevitable tinkering that happens when you’ve had a little distance and perspective to reconsider choices.

Every room has evolved. The kitchen was completely redone. Hint: 1990s kitchens did not wear well in the wash. Bleah!

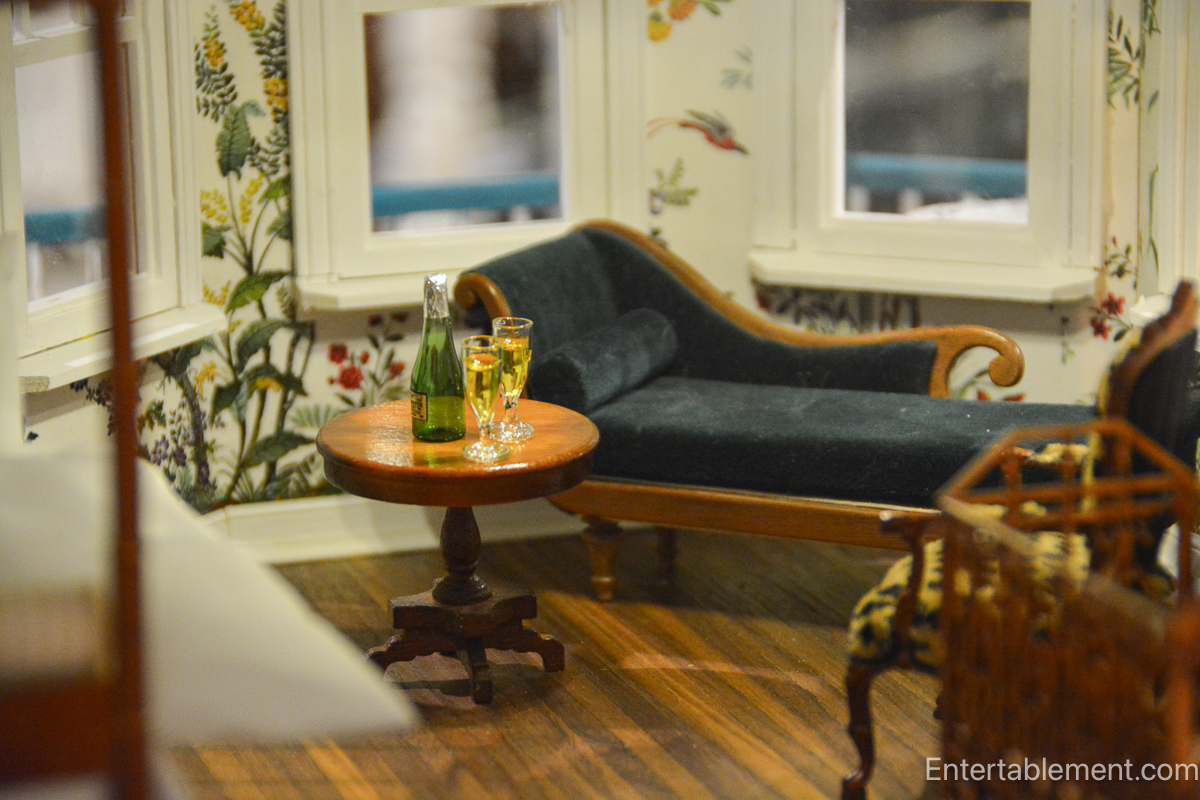
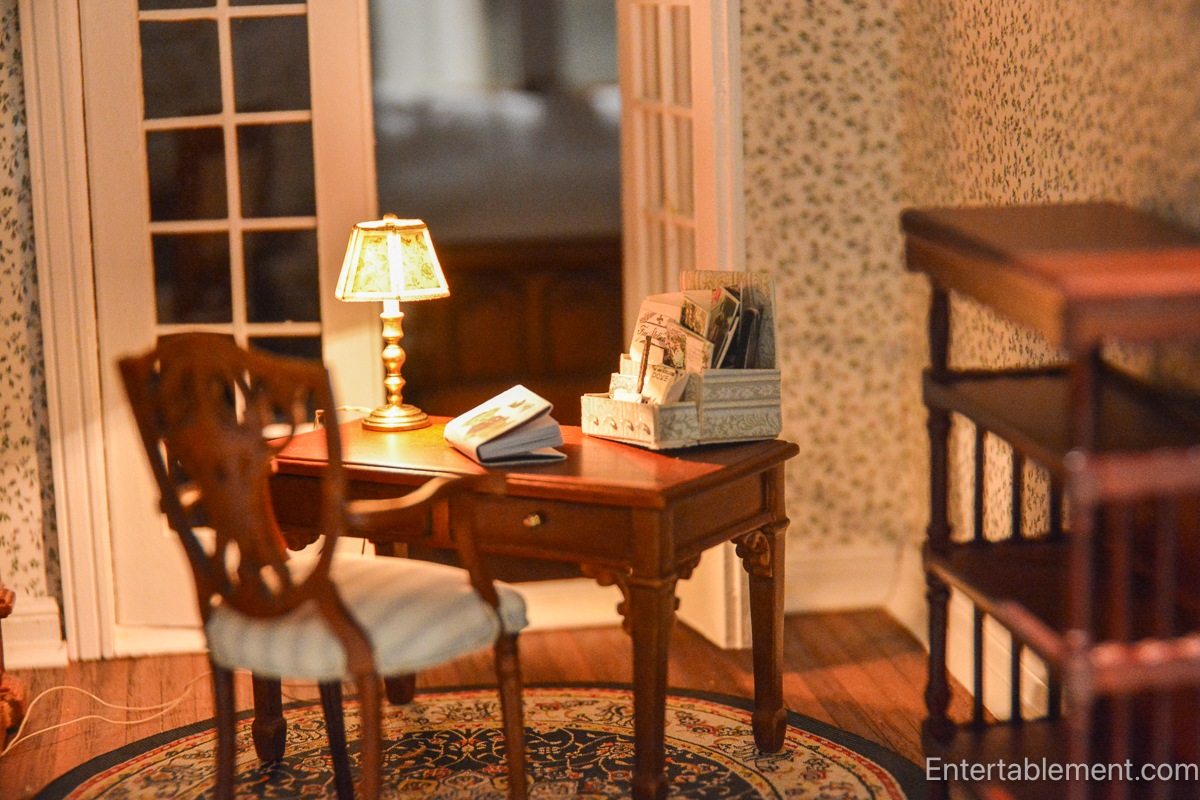
The scale demanded thought; the furniture had to be carefully chosen; the lighting required enormous patience.


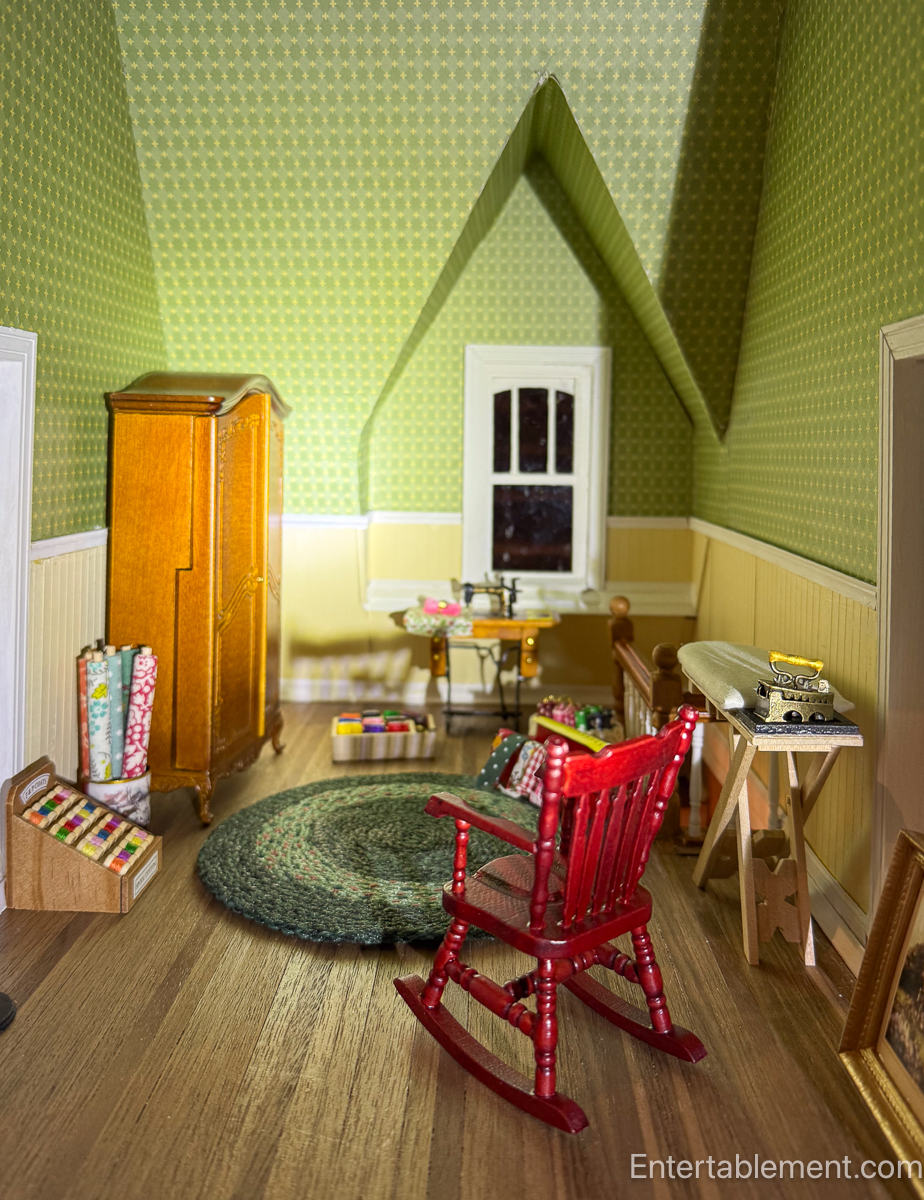
And now, finally, The structure stands complete. We are still sourcing furnishings; I am planning a window seat for the top room in the turret.

The Queen Anne is a companion piece to Grandpa’s house, rather than a replacement.
One built with power tools and precision, the other with hand-cut plywood and quiet determination.
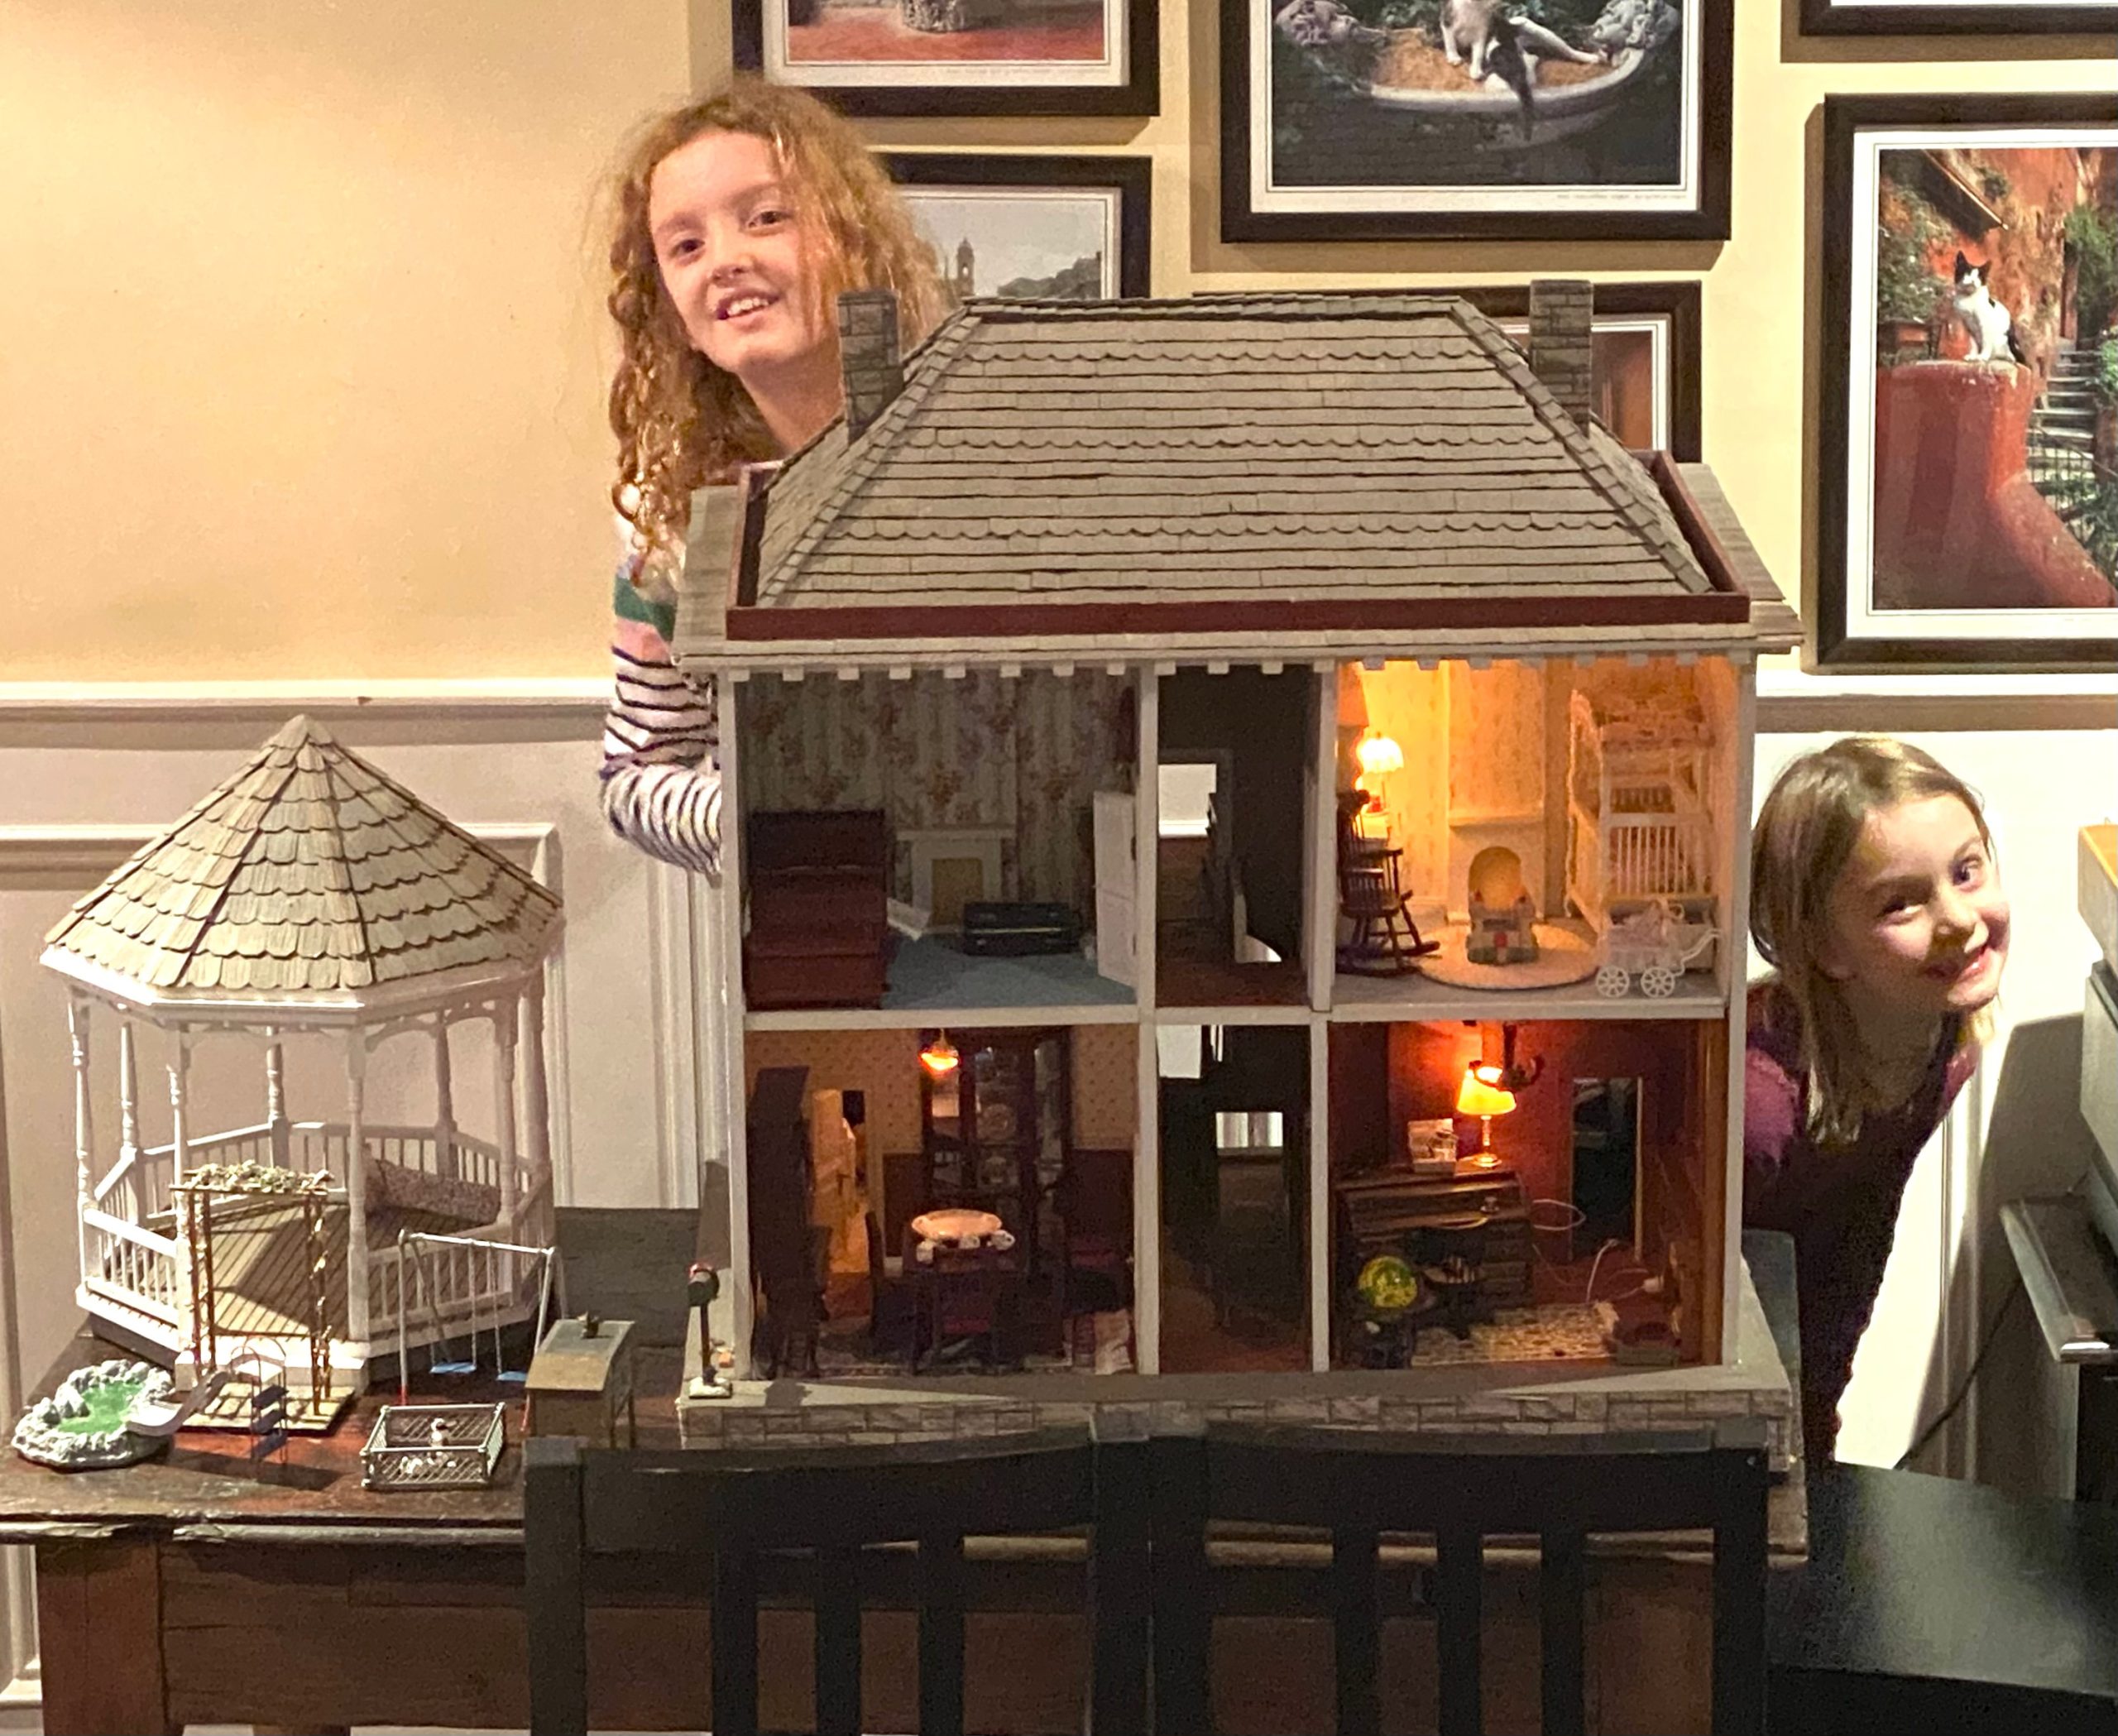
I like having them both in the same room. It feels right.
So if you’re wondering why I was radio silent leading up to Christmas… I was busy hot-gluing, un-gluing, re-gluing, and occasionally questioning my life choices.


That is BRILLIANT Helen!! What a wonderful, if painstaking, project. I can imagine all the joy when it was done and presented! I had a big dollhouse when I was a kid – very much like your original one. I loved it so much! it’s great to see yours. Thanks for sharing them both, and the process too!
Thanks, Barb. Yes, it was painstaking, but a lot of fun. I love to listen to audio books, so those helped while away the time on the tedious bits. But it was challenging, too! I can see why people take it up as a hobby.
Wow, you both did it. I know it took patience, endurance and determination to finish but the end result is amazing. This is truly a labor of love that you have given your granddaughters. Lucky them. We’ll done. What’s your next project/challenge?
We were thrilled to get it finished, Maura. And we both kind of miss the project! But we are finding ways to fill our time. LOL. For now, we are settled in at the Cape, reading, enjoying the fires, loving being able to walk without fearing treacherous ice and looking forward to meals with good friends! Oh – and I am making Beef Stew Braised with Guinness and Oatmeal Pecan Chocolate Chip cookies this afternoon. It’s 45 degrees here today. Woot!
What??? YOU MADE THAT??? I’m impressed.
We did, Barb! And had lot of fun along the way!
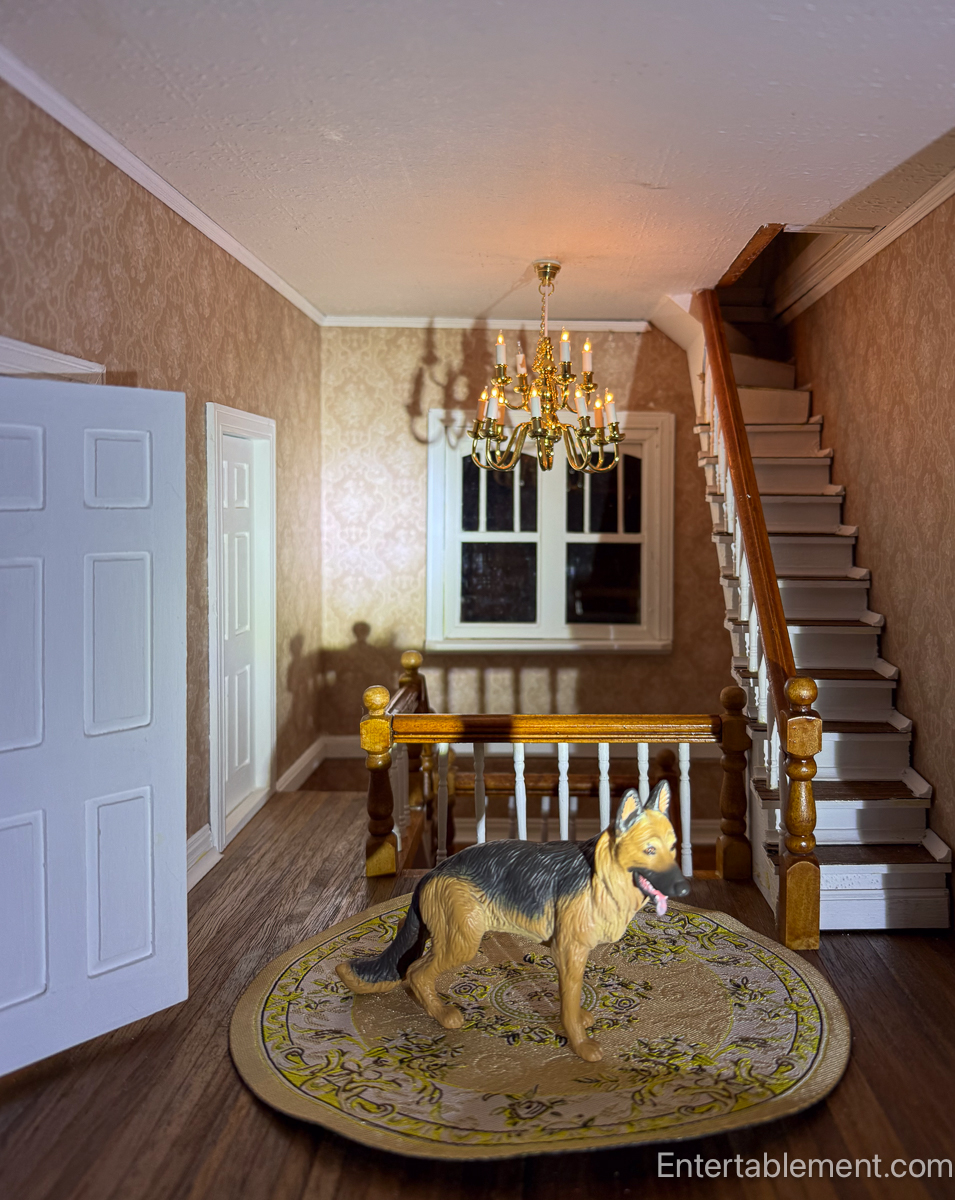
Dear Helen, this is a welcome diversion in a month of family tragedy. You two must have lots of patience and determination. I love the dollhouse-within-a-dollhouse in the room with the sleeping dog. Each room shows so much thought and design sense! What an accomplishment, and sure to be a treasure handed down for generations.
Thank you, Beatrice. It was a real sense of accomplishment to finish it, though the furnishings aren’t complete. That’s the fun bit, though. And I love watching the girls (and their mothers … ahem) rearranging things, and setting out the china.