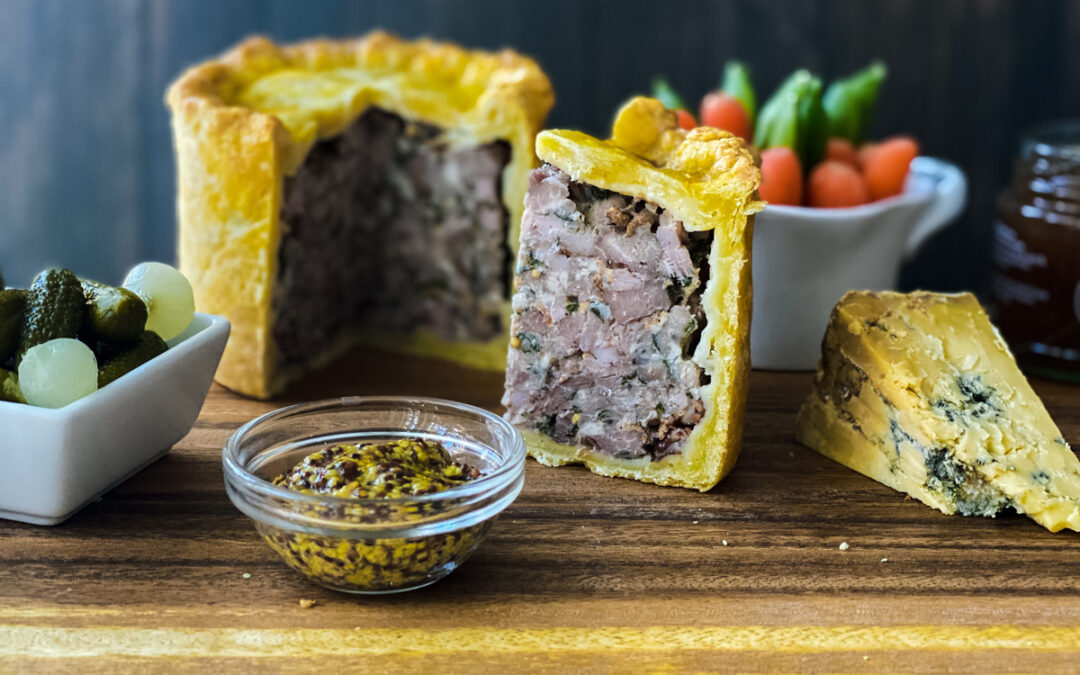
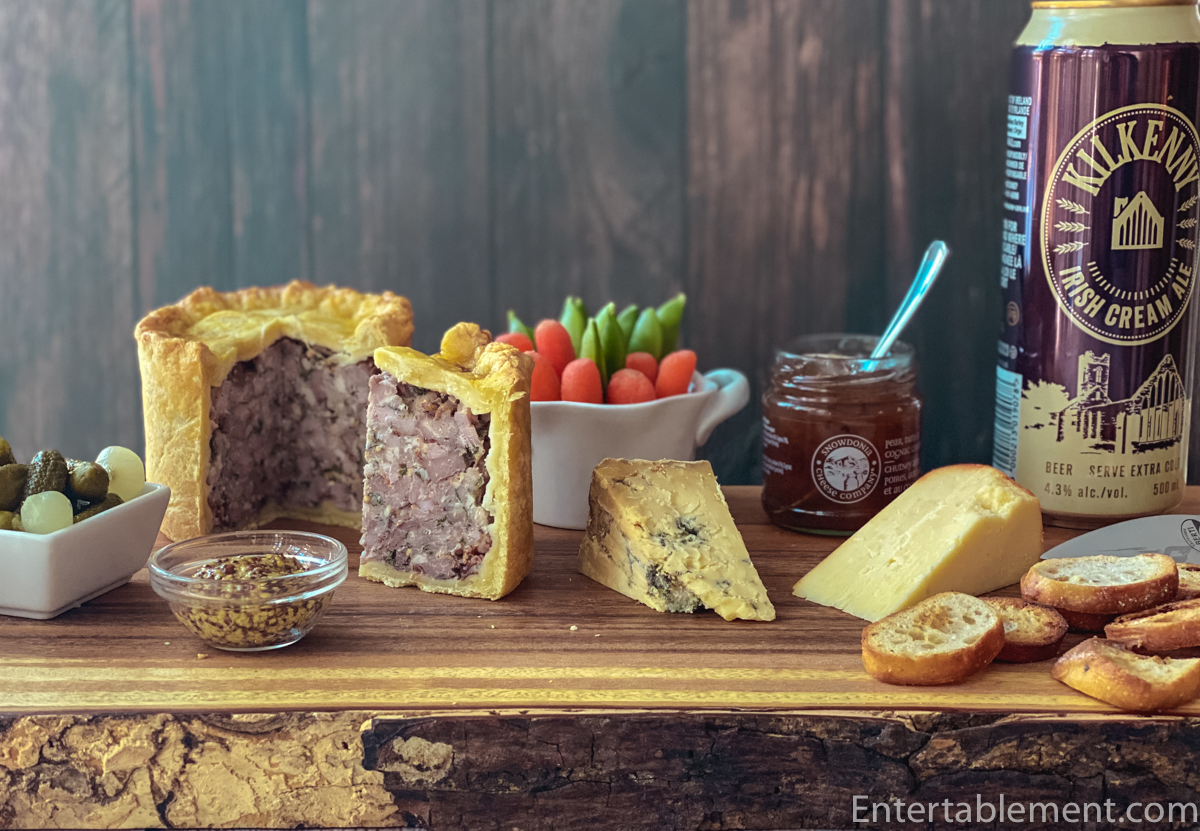
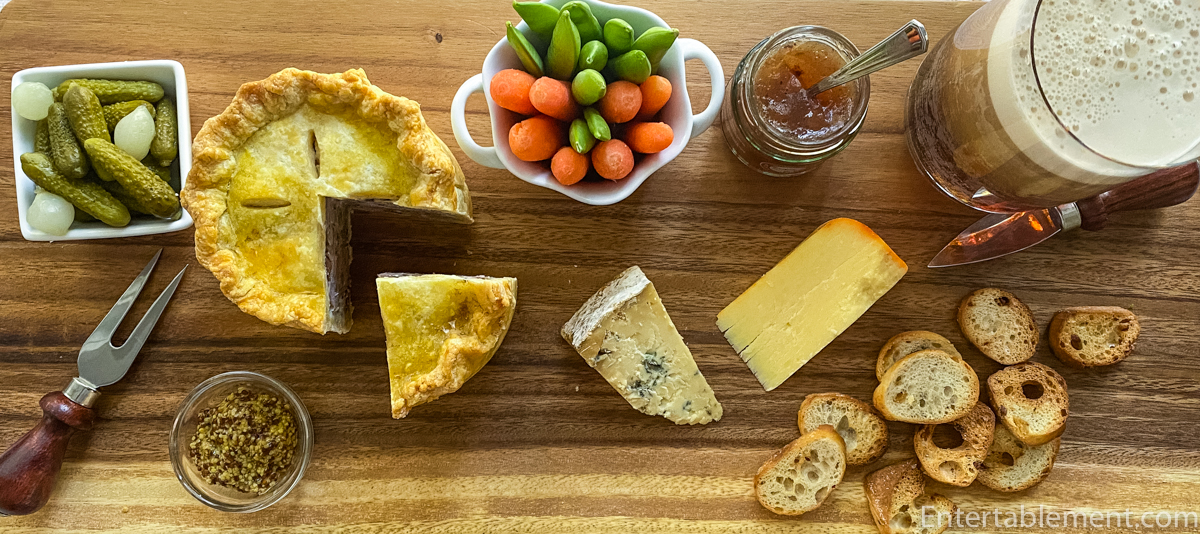
Pork Pies are a staple in the Ploughman’s lunch, usually served alongside Cheddar and Stilton cheeses, Branston pickle, grainy mustard, and some slices of bread. I love cornichons, so those go in, too.
Pork pies can also be served hot; mashed potatoes and peas go really well with it.
The pork pies we enjoy today derive from the raised meat pies of medieval cuisine. Those were encased in a dense hot water crust pastry to transport and preserve the precious meat filling. The pastry was tough and rigid, called a “coffin”. The content of the pies was meant to be eaten cold, and the crust was discarded.
I’m not a fan of hot water pastry; I find it too thick and chewy. Instead, I use Shortcrust Pastry, which makes a lovely flaky crust. It’s sturdy enough to stand up on a pork pie but melts in the mouth.
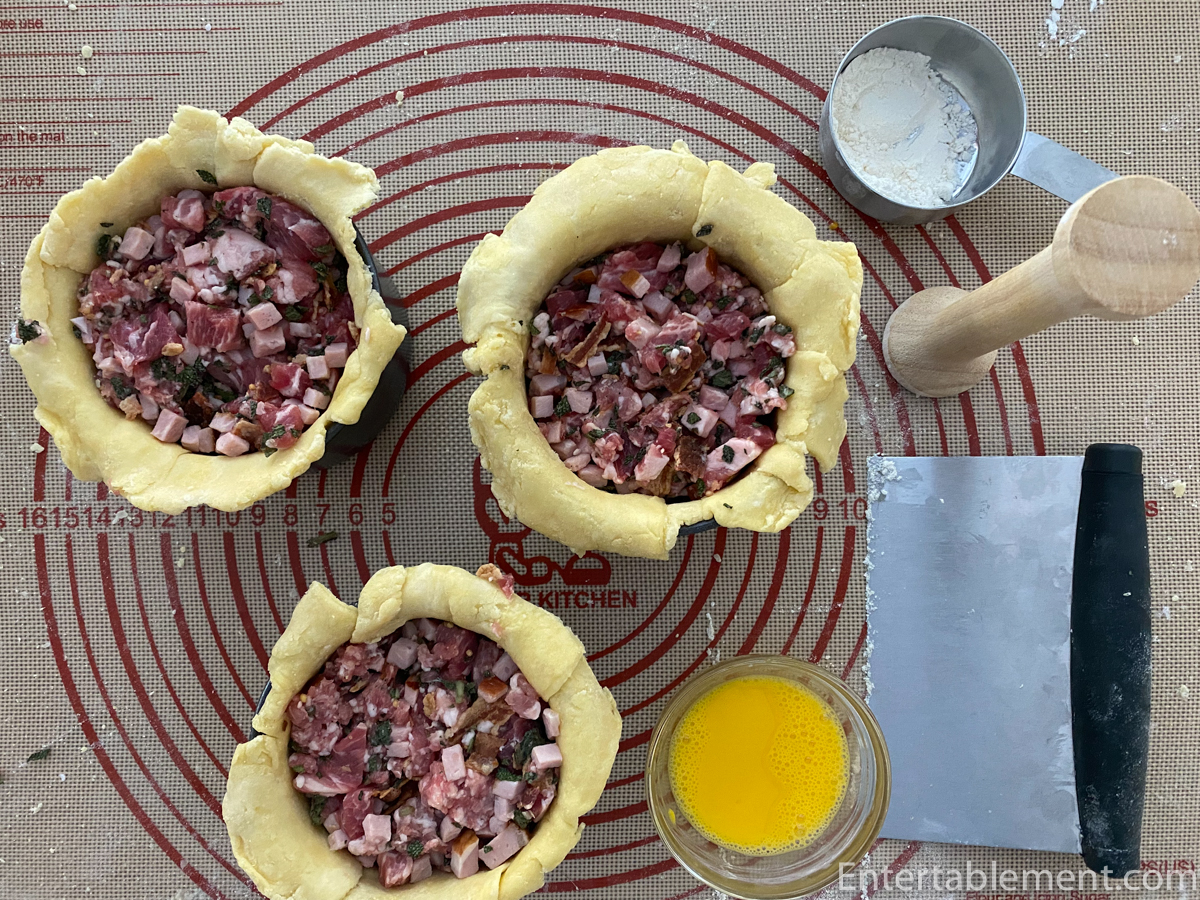
After rolling out a circle of pastry, place the pork pie tin in the centre and cut out four wedges of pastry. Then, slide the pastry down into the tin and adhere the pieces together with a bit of egg wash.

Fill with the pork mixture.
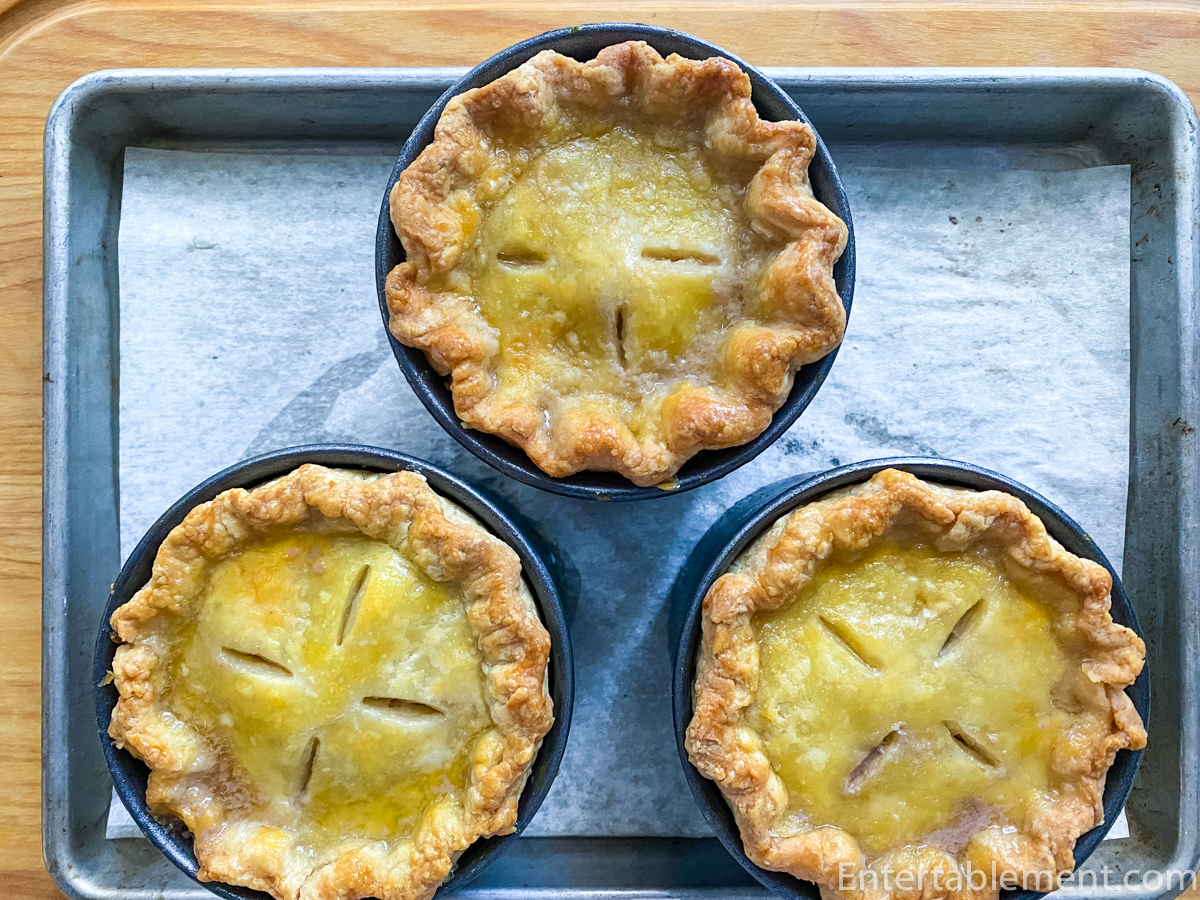
Add the tops and shape the crust edge. Voila! Ready for the oven.

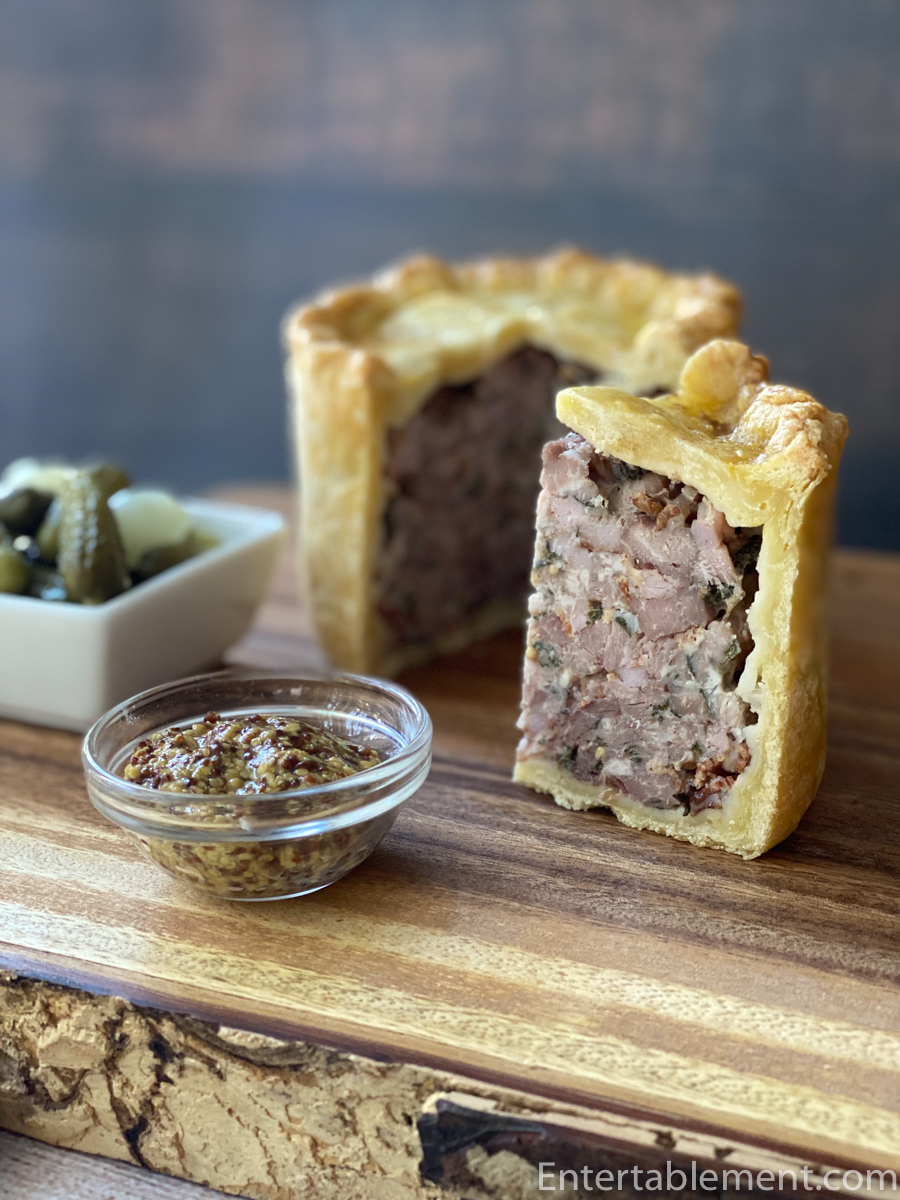
Once baked, allow them to cool a bit before removing them from the tins.
Serve with a variety of cheeses, crudites and pickles!
Enjoy!
Print
Pork Pie
- Yield: Makes three 4” pork pies 1x
Ingredients
- 800 g Shortcrust Pastry
- 1 egg yolk beaten with 1 tsp water
For the filling
- 800 g pork shoulder, half minced and half roughly chopped
- 100 g side bacon, cooked, drained and crumbled
- 120 g smoked pork loin, finely diced
- 1 tsp yellow mustard seeds
- 1 ½ tsp fine sea salt
- 30 g sage leaves (1 bunch), leaves picked and finely chopped
- Freshly ground black pepper
Instructions
Make the filling
- In a large bowl, combine all the ingredients for the filling. Using your hands, mix well together.
Assemble the pies
- Line a small baking tray with parchment paper.
- Weigh out six portions of pastry, three of 150 g and three of 50 g.
- On a lightly floured surface, roll out the small balls into 5” circles, ¼” thick. Trim to size using 4 ½” round cutter. Place the circles on the lined baking tray and chill until needed.
- On a lightly floured surface, roll out one the 150 g portions circle 10” in diameter. Place one of the pork pie tins in the centre of the circle and cut out four equally spaced triangles of dough, about 2” wide at the perimeter and ½” near the pie tin. This will permit the dough to fit snugly inside the pie tin without excess dough. Ease the dough into the pie tin, joining the edges with egg wash. Smooth the dough using your fingers and/or a wooden tamper. There will be a slight excess of pastry hanging over the top, which you’ll use to secure the lids. Repeat with the other two 150 g portions.
- Preheat the oven to 375°F.
- Divide the filling evenly between the lined pie tins. Remove the pastry lids from the fridge and secure one to each of the filled pie tins with egg wash. Fold the excess pastry over the lid and firmly press to join them together. Crimp the edges using the thumb and forefinger of your non-dominant hand and the forefinger of your dominant hand. Using the tip of a knife, make four evenly-spaced slits in the pastry lids to allow steam to escape. Brush the lids with egg wash and return the filled pie tins to the parchment-lined baking sheet. Chill for at least an hour.
- Place the tray in the pre-heated oven and bake the pies until the core temperature reaches 160°F (about 45 minutes).
Notes
Adapted from The Pie Room by Calum Franklin
MasterClass 4″ Pork Pie tins are available from Amazon.
The pies can be eaten hot or cold.
Hot: leave the pies to rest for at least 10 minutes before serving with mashed potatoes and mixed greens.
Cold: let the pies cool for an hour before removing from the tins. Chill thoroughly before serving with pickles, chutney, crudites, and a variety of cheeses for a traditional ploughman’s lunch.


Is the pork shoulder precooked or browned? If not, how does the rendering not make the bottom of the pie “mushy”? Yours looks nice and crispy, but it’s not prebaked, so I wondered how that was achieved. Also, is the smoked pork loin something from the deli counter? Or is it a kind of deli ham? I was watching Doc Martin on PBS and they were eating pork pies and I was curious as to what it was, your recipe looks delicious and very British, and I would love to try it!!
Hi Elena,
The pork shoulder is not pre cooked. I chopped half of it finely (minced) though you could ask your butcher to put it through the grinder for you if you prefer. It’s not particularly fatty, and the pastry doesn’t come out mushy on the bottom.
We are lucky enough to have a good butcher nearby and our grocery store has a great meat counter. You can get smoked pork loin at the deli counter.
Good luck with the recipe! Don’t hesitate to email me if you run into any problems or have more questions at info@entertablement.com.
Love Doc Martin! I tracked down that cottage on the Cornish Coast where the pharmacist took the kidnapped baby. It’s a National Trust Property and you can rent it! I had it booked for spring of 2020. Unfortunately, we know how that turned out! I’ll try again at some point in the future.
Best,
Helen
I do not like the pastry round traditional pork pies, I find it ddistasteful and hard wherezs the filling of pork meat is delicious, so am pleased that they can be successfully made with shortcrust which is so much flakier.and will try them when it is picnic time Thank you for the suggestion..
Yes, traditional pork pie pastry can be just dreadful. I was so pleased to find an alternative! I hope it works well for you. I find the pastry very easy to work with.